This page is a combination of what I discovered during the lift install and
after I took it off-road to see how it operated. I'll add to this
page as I discover more stuff. As I install or discover how to fix
items I will post an UPDATE:.
| 1.
Rear UCA's need to be bent to clear muffler, and align better with
axle brackets. Having them straight with Johnny joints at
the end do provide for a very strong control arm, however clearing
the muffler and gaining a little more clearance between the
side of the axle bracket would be beneficial. Then you wouldn't
have to spend the extra money to replace the muffler. There
basically isn't a solution to this, you just have to install a new
muffler, or have yours custom bent. |
 |

|
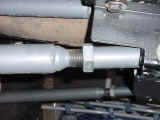
| 2.
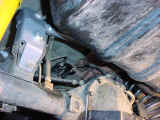
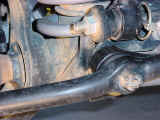
Rear track bar bracket needs to be braced. The extra force
generated by the lift kit on the factory bracket can cause the welds
to tear free of the axle. There is a bracket available from Tri-County Gear to fix
this.
UPDATE: This has been fixed with the TCG
Bracket install. |
 |
| 3.
Compressor Relocation. This only applies to the Rubicon's,
but can be a real pain. The easiest way is to flip the whole
bracket over (requires disassembly of parts) and screw it into the
bottom of the floor. You will need to make brackets for it. |
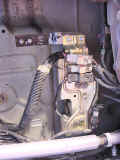 |
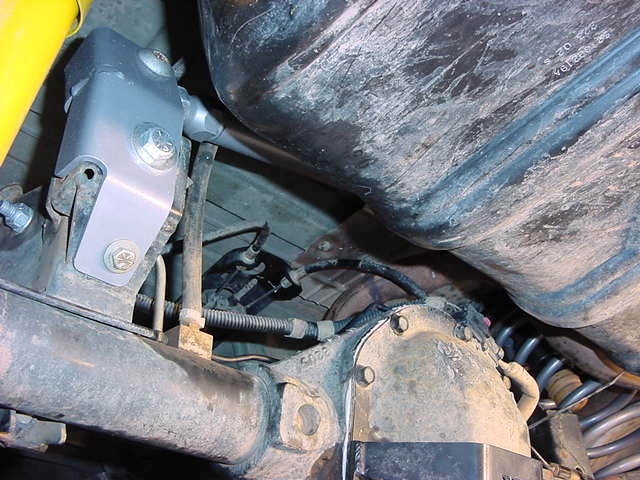
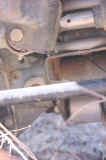
| 4.
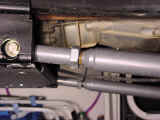
Brake and Fuel line relocation on the Driver side frame. No where does it mention that you have to relocate all of these or
they will rub on the big 1/2" Grade 8 bolts that stick through
the frame. 3 or 4 simple brackets should fix this problem.
UPDATE: I have solved this problem with some standoff
brackets that I fabricated. |
 |
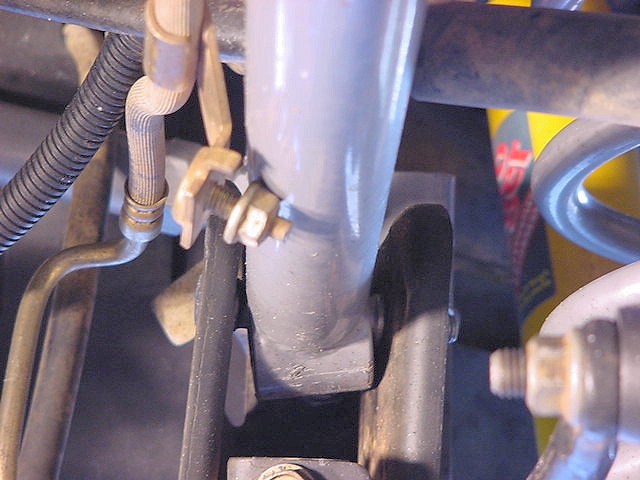
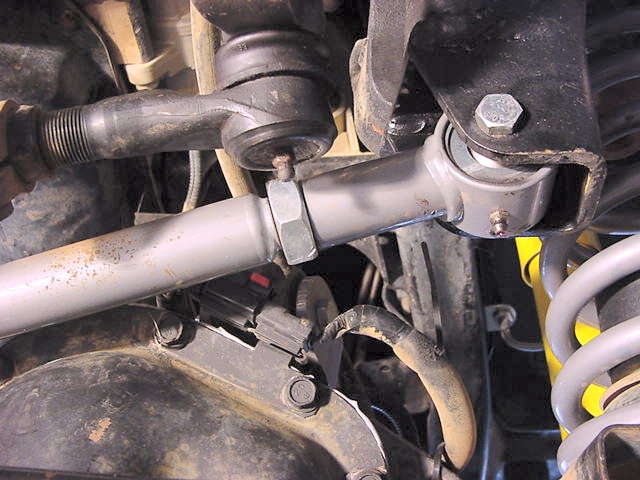
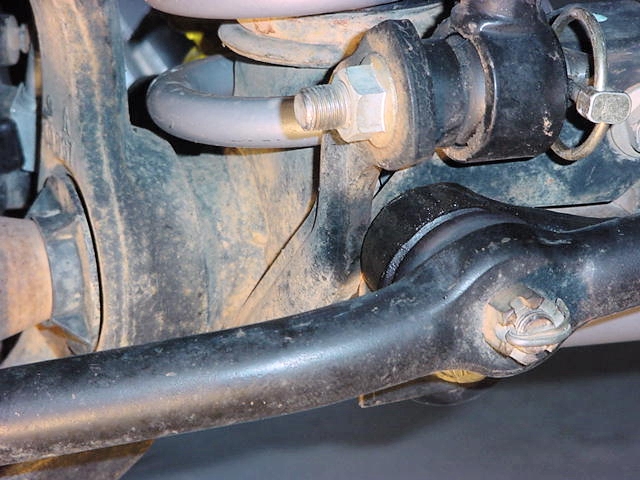
| 5.
Front RE track bar extension bracket moves under load. While
the bracket is solid, the extra force is transmitted to the frame.
The frame gives under this load. I ordered a brace for this
bracket from Nth Degree
Mobility.
UPDATE: Okay I received the brace from nth Degree, I'm not very
happy with the design of it. Since I didn't have the fabrication
tools to really try this, I figured I would buy it. Well I'm
not back to the drawing board to design a bolt on brace, unlike
the one from nth degree that you have to weld some parts on first. |
 |
|
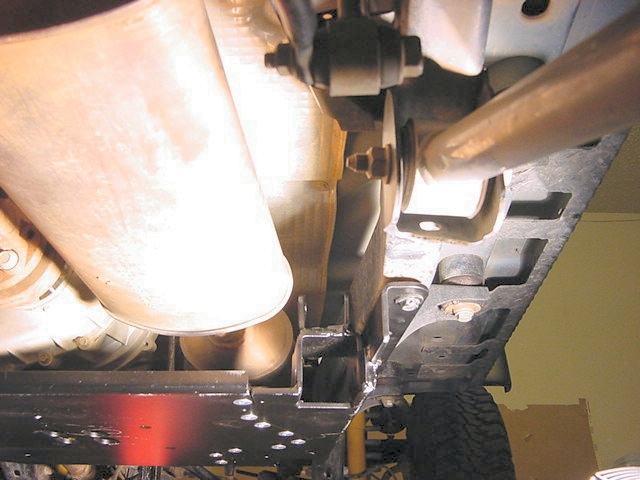
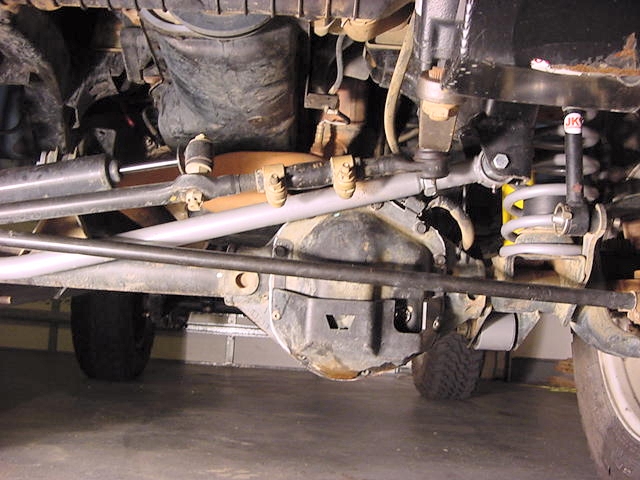
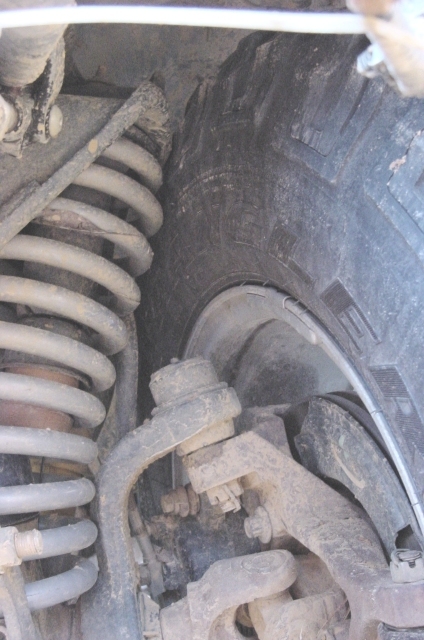
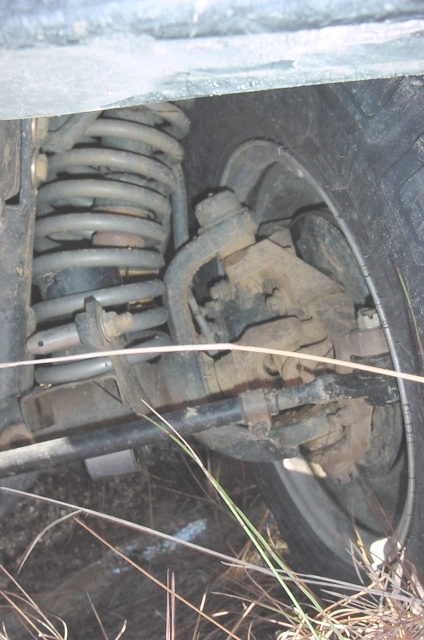
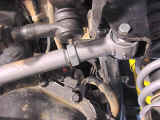
6. Front RE track bar is very close to differential. The stock bar has a bend in it to clear the differential.
While the RE bar may not hit on the Dana 30 differentials, the Dana
44 housing is larger. I do know that it hits with the 3.5
springs, and have heard of at least one 4.5 spring rub. If
this bar was bent like the RE 1600 bar there would be no clearance
issues. I definitely have a rub with this track bar.
I tried to install the RE 1600 bar but is sat very close to the
electrical connector on top of the Dana 44. Nth
Degree Mobility used to bend this bar. I will try to find
someone local to give this bar a bend for me. UPDATE: I determined that this bar needs
to be bent in about the same position as the RE1600 bar, I double
checked with a friend that has a bent bar from nth Degree Mobility
and my thoughts were correct. You can see the changes on my Additional / Modified Parts page. With the bend in place I needed to screw out the adjustable
end 2 complete turns to get it to line back up. |
 |
 |
|
7. Front RE track bar is to long. I needed
to trim off 1/4" of thread on mine so that I could center the
axle. Now if it had the bend in it like above, it would have
been fine. UPDATE: If you do the above mod with bending
the front track bar you should have enough room so that you won't
need to cut. |
 |
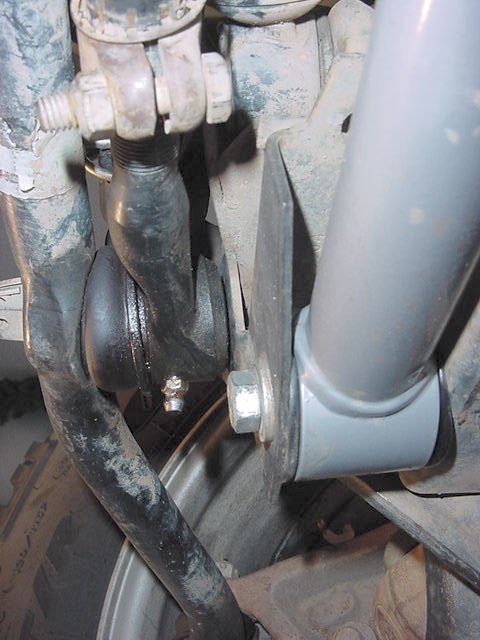
| 8. Front Tie Rod to Drag Link connection point. Now this
is a by product of the Long Arm adjustment. All you need to
do is shorten up the front lower control arms and pull the axle back
a ways. Mine hits the passenger side anti-sway bar end link
axle connection bracket. I have tried to adjust the axle position
to fix this, but I have been unable to find a good solution.
When I had this off road with the vehicle flexed it is readily apparent
that this is hitting pretty good. The stock Rubicon's position
is pretty close, so I know this is a by product of the lift.
I may need to shorten the front control arms to get this to clear. |
| |
 |
 |
 |
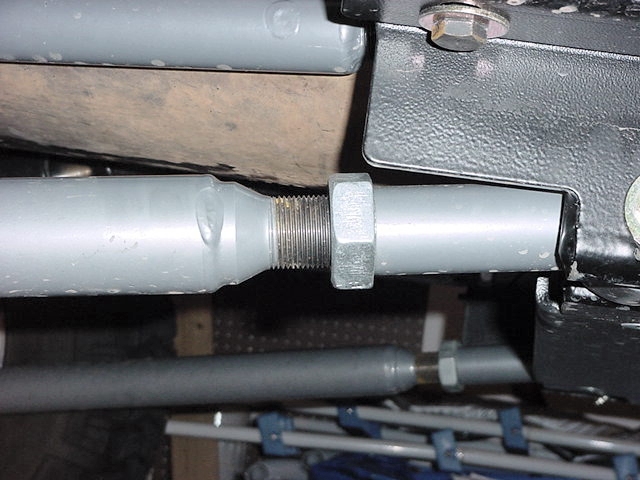
| 9.
RE front UCA's are to short on the threading. This is probably
the biggest issue I have on the whole kit. I only have 1/2"
of thread engagement for a 1" diameter thread, Arms are adjusted
for 0 differential angle on the pinion to drive shaft. Now they
do have the lock nut on them to provide a little additional thread
engagement, but it really doesn't count. A good rule of thumb
is 1 diameter worth of thread engagement at a very minimum.
1 1/2 diameter thread engagement is ideal. I ordered some extended
length upper control arms from Nth
Degree Mobility.
UPDATE: Once again I wasn't to happy with the first set of arms
that were shipped to me, wrong ones, but one phone call and the
correct ones were on their way. I have since decided to not
install these arms. They are a little longer than the RE's,
but not by much, I will carry them as trail spares though and if
I see any problems starting with the RE's I'll install these. |
 |
| 10.
Length of bump stops. This is versus compressed length
of OME shocks. The bump stops should be stopping your upwards
travel of your axle, not your shocks. The bump stops will almost
completely compress into their cups when limiting the travel.
In the front I need 1 1/2 inch more of bump stop to prevent
this. In the rear I am right at the mark so an extra 1/2"
would make it safe. I know RE makes an extended front
bump stop (RE1395), so I might try that one. For the rear I
may end up stacking a set of the OME spacers with a longer bolt.
UPDATE: I had this off road and verified
that I do need the longer front bump stops. At full flex I
wasn't even hitting the bump stops. I was using the shock
to stop travel. Not good. The rear did appear to be
okay, but if I had the RE shock relocators welded in, I would need
longer bump stops there. |
 |
 |
| 11.
Rear Lower Control Arm Zerks. It's a great idea to keep
your bushing lubricated, it's even a great idea to have a flat skid
plate, but who ever decided that we needed to hang this really big
90 degree Zerk off the bottom of the skid plate end of the rear LCA's
needs to rethink this idea. You can't put them on top, because
of the upper arms mount. The rotation of the lower arm would
snap the Zerk off, so here it sits exposed for the first rock to come
buy and snatch it. I will be looking for a couple of flush mounted
or low profile Zerks. |
 |
| 12.
The Lower Control arm jam nuts. Let's see exposed threads,
and a jam nut to hang down to catch on things. It wouldn't be
to bad if it was a beveled transition, but it's not. I will
eventually design a couple of sliders for this area to cover up this.
They should also lend a little extra support to this area. |
 |
 |
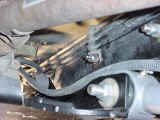
| 13.
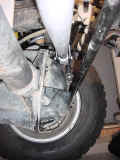
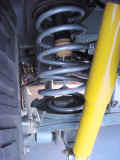
Rear Track bar hits on the gas tank skid. Now I know this is caused
by rolling the pinion, but the factory bar has a slight bend/ offset
to it. I will look at this more and see if I can come up with
a way to fix it.
UPDATE: After adjusting my pinion, my rear track bar just clears
the gas tank skid. |
|
|
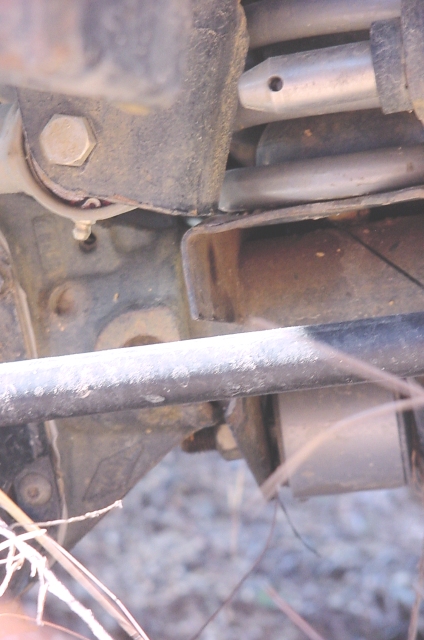
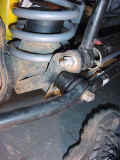
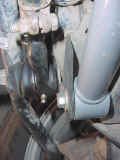
14. The RE Front Track bar Drop down bracket hits
on the front spring perch. This should easily be corrected
by putting in the correct length bump stop. It hit hard enough
off road to leave a bend in the spring perch, not bad, but you could
see it. UPDATE: After adjusting my front pinion angle, the bracket now
clears the mount arm at full travel. |
 |
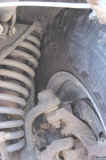
| 15.
The Front tires impact the shock towers. During full flex
of the front end, the stock 31" tires on the MOAB rims hit the
shock tower. Now if I had 33's on here they would hit a little
earlier. These should be spaced out. I believe that either 4"
backset rims or the Spidertrax spacers should solve this problem. |
 |
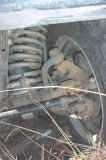
| 16.
The front springs press against the Axle steering knuckle support. This happens at full flex. The spring kind of gets a slinky
effect and pushes out against the steering knuckle. Some of
this will be alleviated by the proper bump stops being installed.
No real issue, just wanted to let you know before you saw it. |
 |
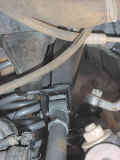
| 17.
Rear Shocks Rub on Gas Tank. At full extension and compression
I noticed that the rear shocks are rubbing on the gas tank.
My rear axle sits about 1/2" shorter than factory measurements
and positioning. I am going to have to relook at this area.
I do have the tera relocators, and they do put the bottom mount locating
further back and down than the RE brackets would. I think this
is part of the problem. |
 |
| 18.
Instructions and customer service suck. I tried to call
RE about a couple questions and talk about the issues that I had with
this kit. All I got was a disrespectful attitude on the phone
from any of the 3 people I talked to (2 guys, 1 girl). They
basically told me that I should have had a professional installer
do the work (yet they couldn't name any in my area, nor provide me
with the requirements to be a professional installer). I did
get the statement that a professional installer needed to be familiar
with their kits and have installed them in the past. Okay well
since I've installed a few of their kits, (first long arm), I must
qualify. That got me more attitude. When I brought up
the above issues I promptly got told that they had never heard or
experienced these problems so I must have installed the kit wrong
since I wasn't a professional installer. Hmmm back to square
one with RE. It also took me 7 weeks to get all the parts for
the kit. After multiple phone calls and emails. I'm pretty
certain that I am off of their Christmas Card list. |
| *More
flex shots here. |
|
|
|