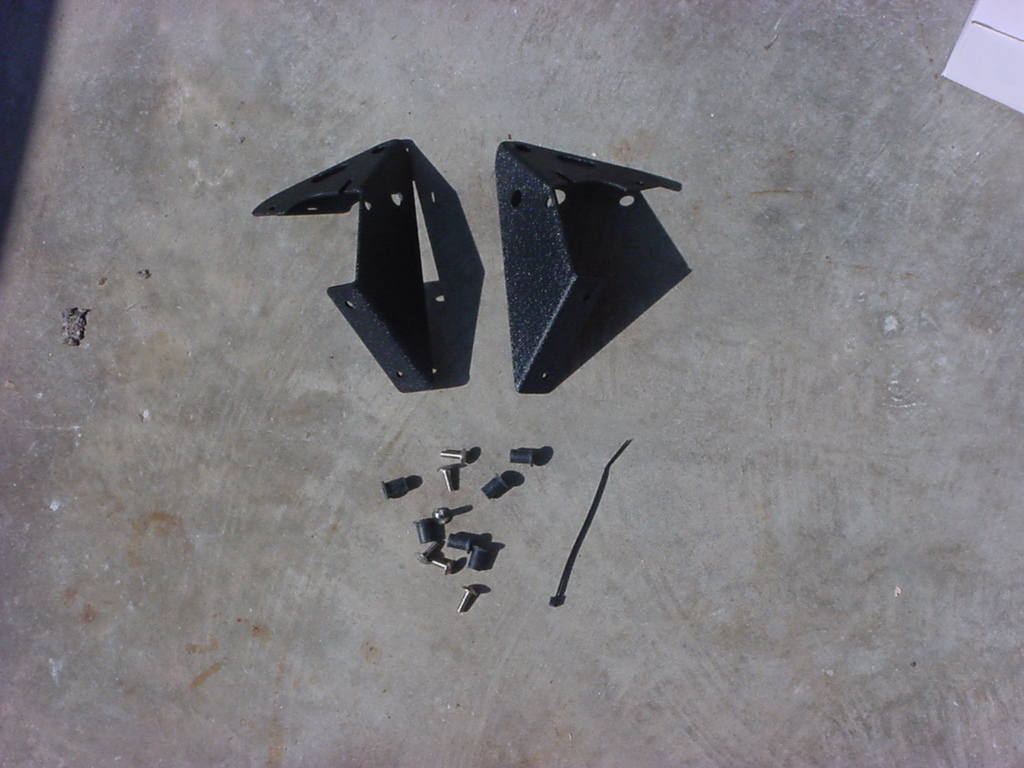
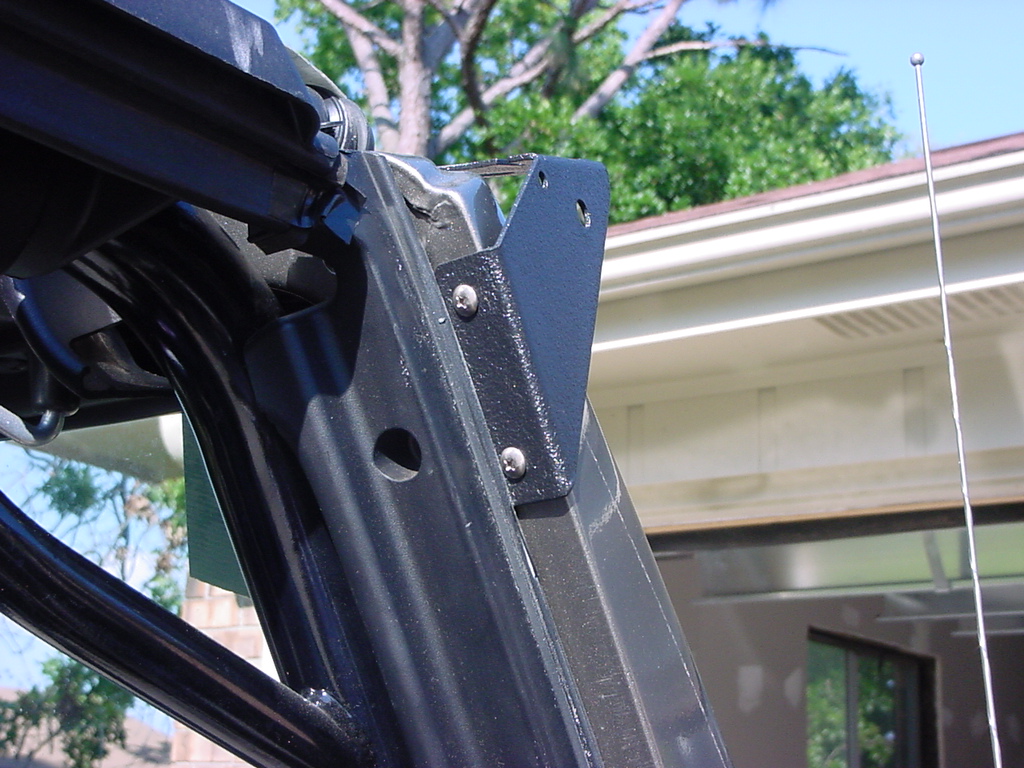
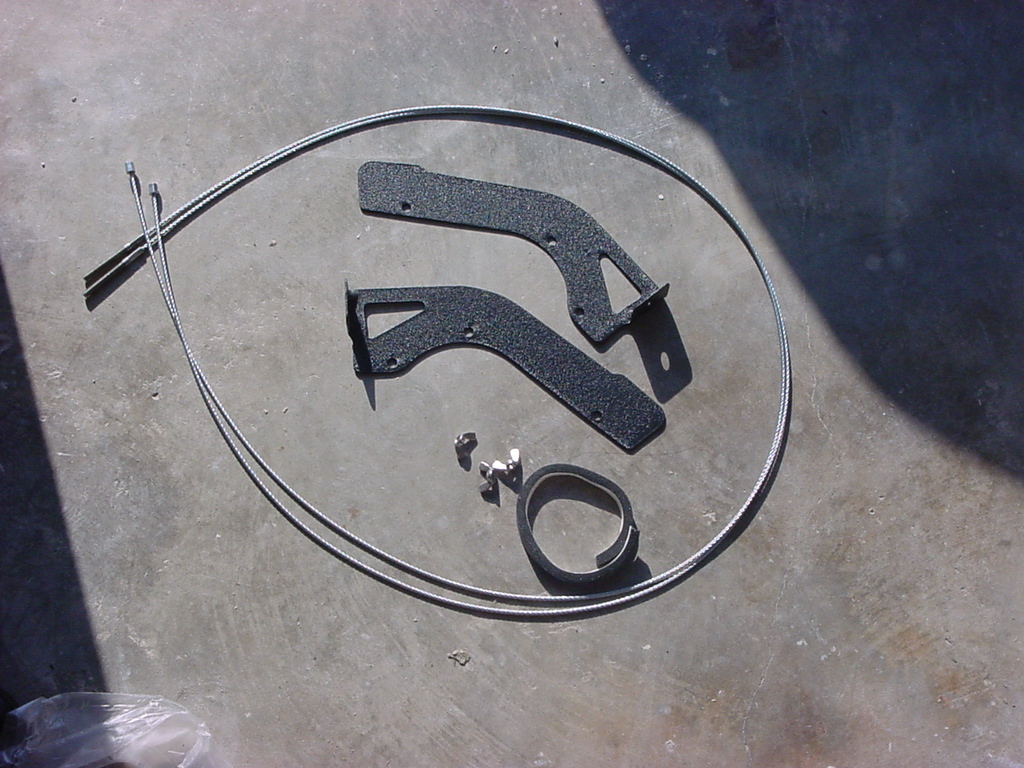
Part #: 000290 (Fender bracket) / 000306
(Windshield bracket)
A few of us ride through wooded areas and constantly have
branches slide across the hood then smack into the windshield before snapping
around and hitting us through the open side window. I was looking for
something to at least take care of most of those offending branches by
sliding them up and over the jeep. I remembered that the Army Rangers
had a steel cable that ran from the front of their vehicles to a cutter
assembly on the top to take care of any nasty surprises out in the field.
I figured something like this would work well, okay without the cutter
assembly. A quick search brought up the Limb Risers by Tough Stuff Products.
Additional Parts:
Double sided foam tape
Tools Needed:
Drill
3/16 & 5/16 inch drill bits
Dull kitchen knife or equivalent
Phillips screwdriver
Center punch
Hammer
5/16" Socket
1/4" Drive ratchet
Here is the Tough Stuff Install PDF files that I used.
Note: These files may be updated or changed at anytime, so check with
Tough Stuff Products for the latest version.
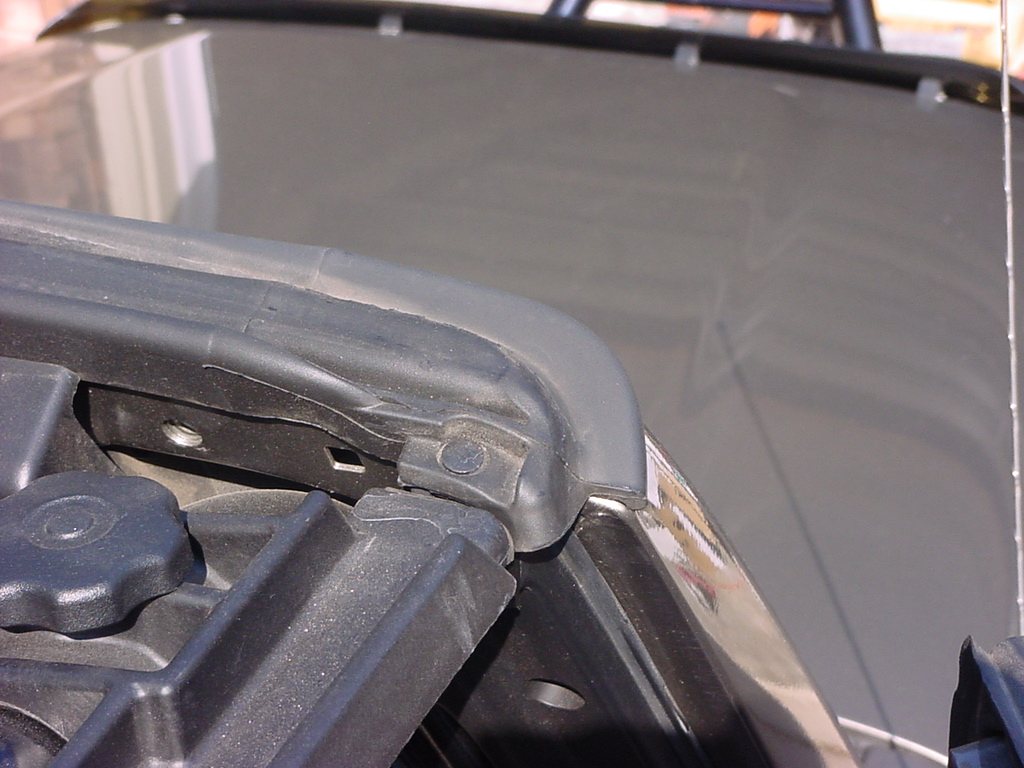
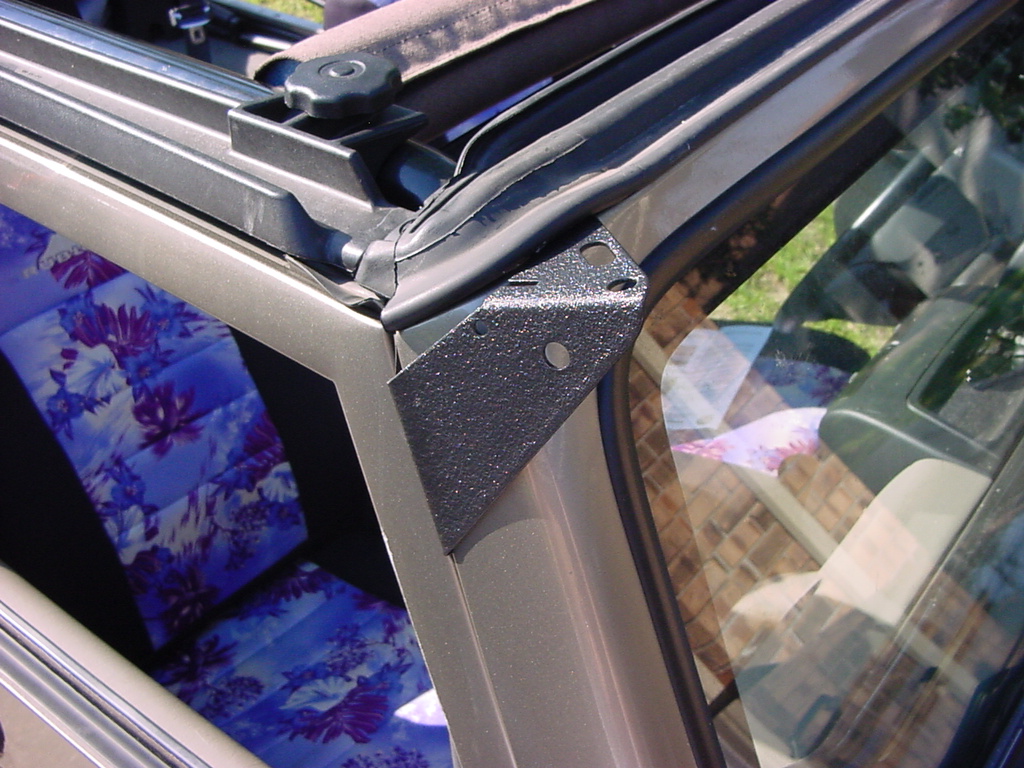
2. Remove hardtop or fold back soft-top to access top corners of windshield.
3. Using the dull knife, carefully peel off the thick rubber gasket
on top of the windshield, app. 4 inches inward on each side.
Carefully pull the rubber off the plastic retaining pin and tape
the gasket back as pictured.
4. Hold the bracket in place; note how the top mounting surface will
sit flat when properly placed. Hold bracket in place and use the
3/16 inch drill bit to drill through the lowermost hole (into the
doorframe). I used a center punch and hammer to keep the drill from
wandering.
5. Remove the bracket, use the 5/16 inch drill bit to enlarge the hole
you just drilled. Insert a rubber Well nut into the hole and bolt
the bracket in place. You will need a phillips screwdriver.
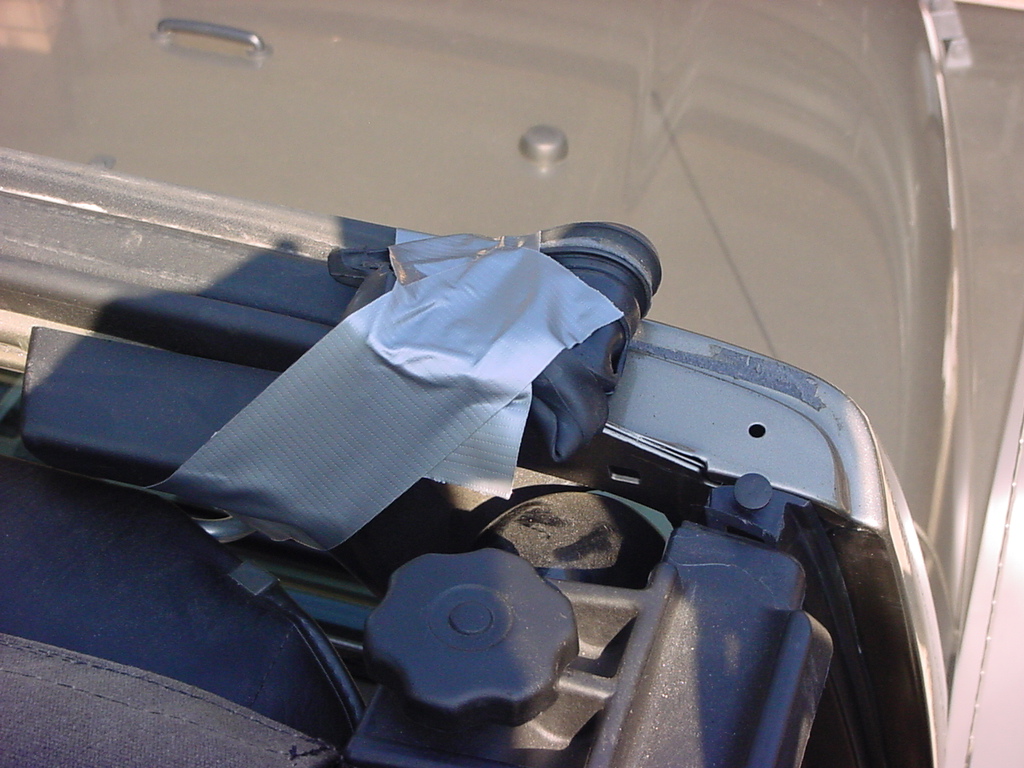
6. Next, drill through the topmost hole into the top of the windshield
frame. Remove bracket.
Repeat above steps to install Well nut into topmost hole. Bolt bracket
into place with BOTH top and bottom bolts and Well nuts. You will
need a phillips screwdriver.
7. Drill 3/16 inch hole into CENTER hole in bracket. Remove and repeat.
The bracket lines up better if you actually do drill and remount
each time.
Note: Be very
careful drilling out the holes, especially the top one. I managed
to snap a 3/16" drill bit off inside my windshield frame. Just
one more thing to rattle around.
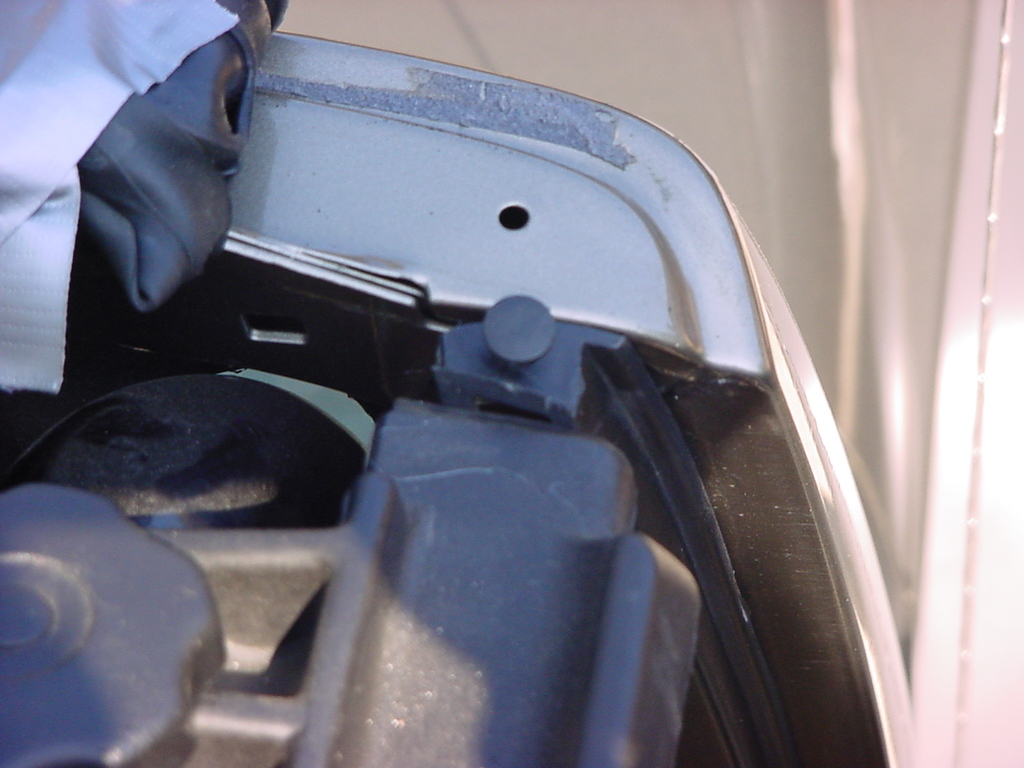
8. Remove duct tape and carefully stretch rubber gasket back over plastic
retaining pin. Re-adhere the gasket back into original location.
If it does not stick well, you may have to use a weather strip adhesive
(available at any Auto parts store) to glue the gasket in place.
Install
Fender Brackets
1. Lay out the parts for the fender.
2. Remove 5 each 5/16
inch bolts that secure the front of the plastic fender flares to the
fenders. Lay these bolts and the plastic nuts aside. Repeat on both
sides of the Jeep®. This is a really tight fit for anything larger
than a 1/4" drive ratchet.
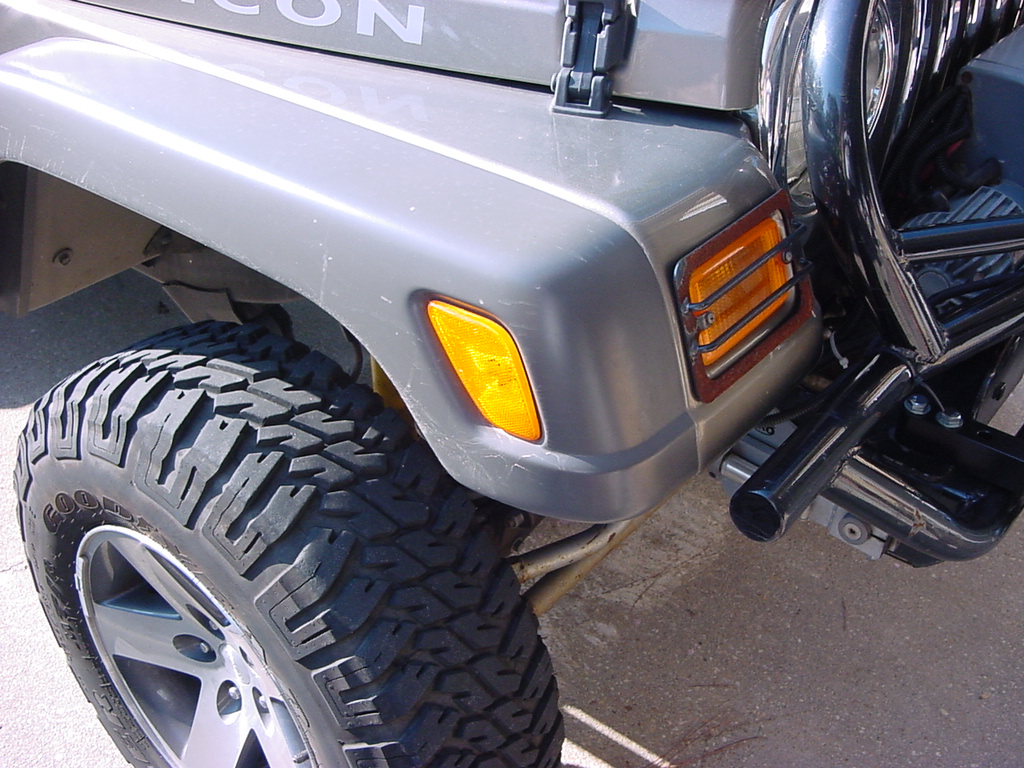
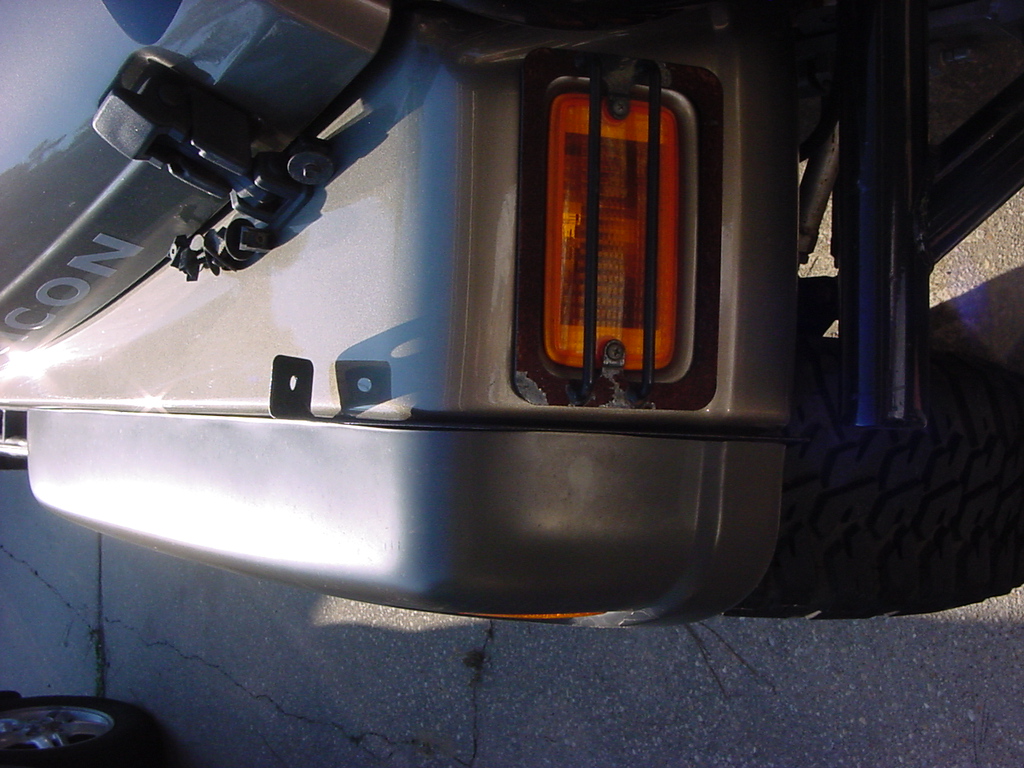
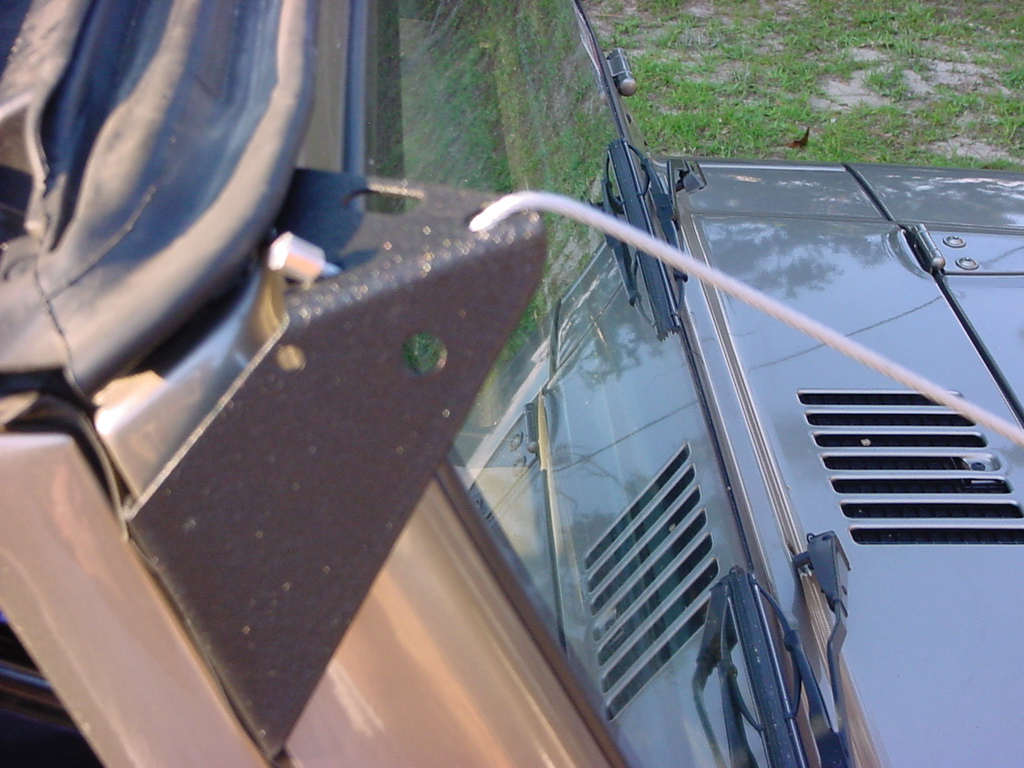
3. Pull the plastic flare
out and slide the Limb Riser bracket into place as pictured. The photo
that is on the instructions is at a really bad angle, but it looks
like the cable mount goes towards the hood. I found that it doesn't
matter which way you mount it you will scrape the side of your hood
up if you lift the hood, even to only use the hood prop (not like
many of us use that ).
This should be the correct way.
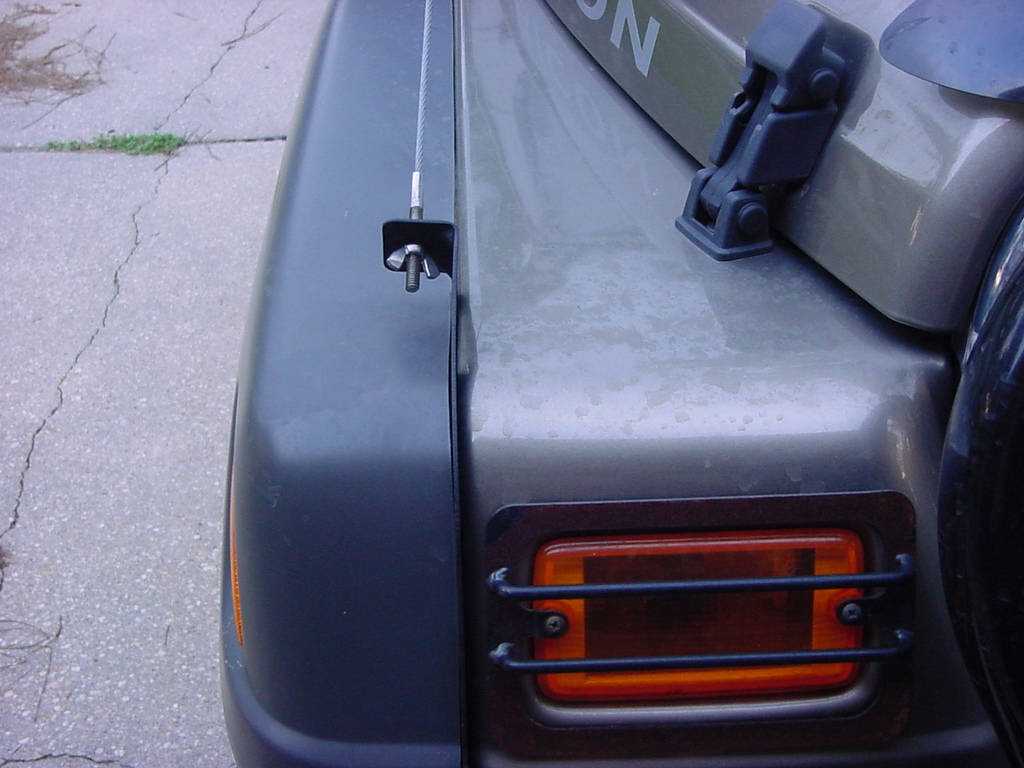
This is backwards
4. Cut the
black foam into 2 pieces, each 6 inch long. This will be used to fill
the small gap between the flare and the fender when the bracket is
installed. Place the foam level with the top of the plastic flare
in the area directly behind the fender bracket.
5. Replace
the 5 bolts and plastic nuts, sandwiching the bracket in place. Three
(3) of the bolts will go through corresponding holes in the fender
bracket. Tighten all 5 securely.
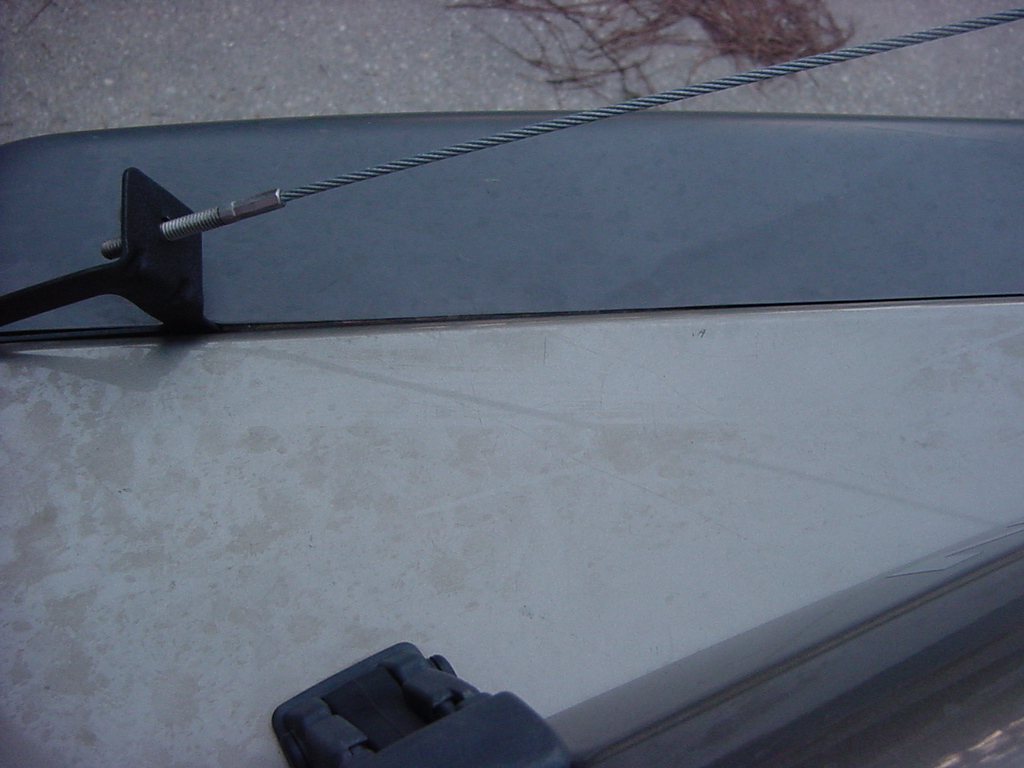
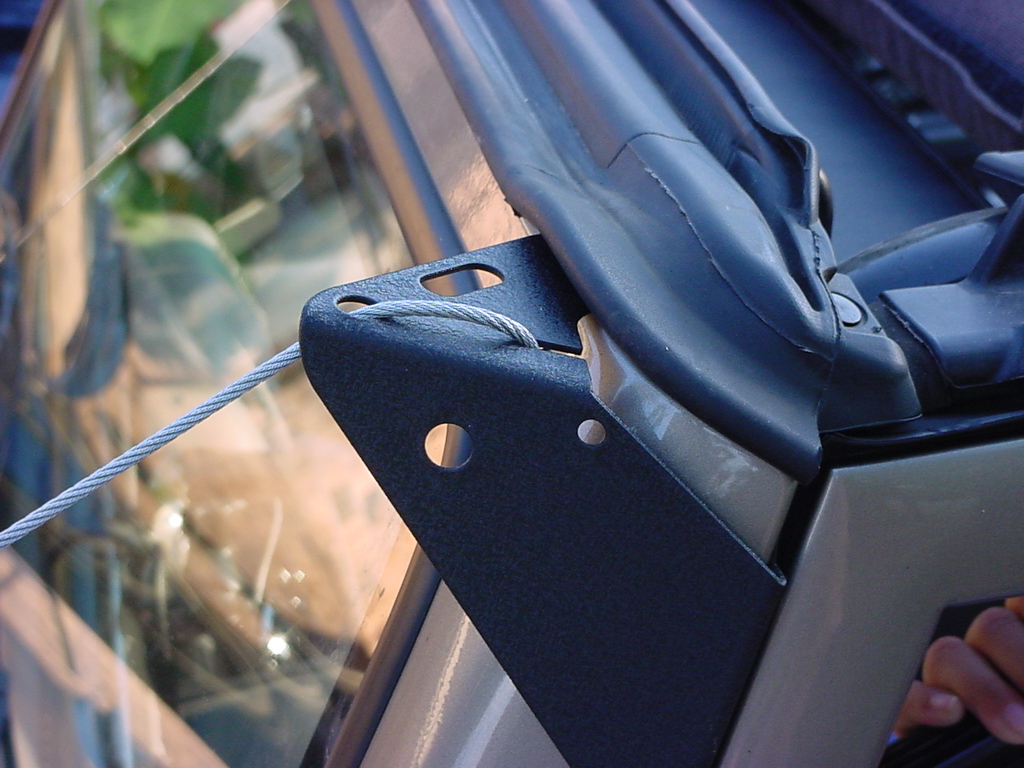
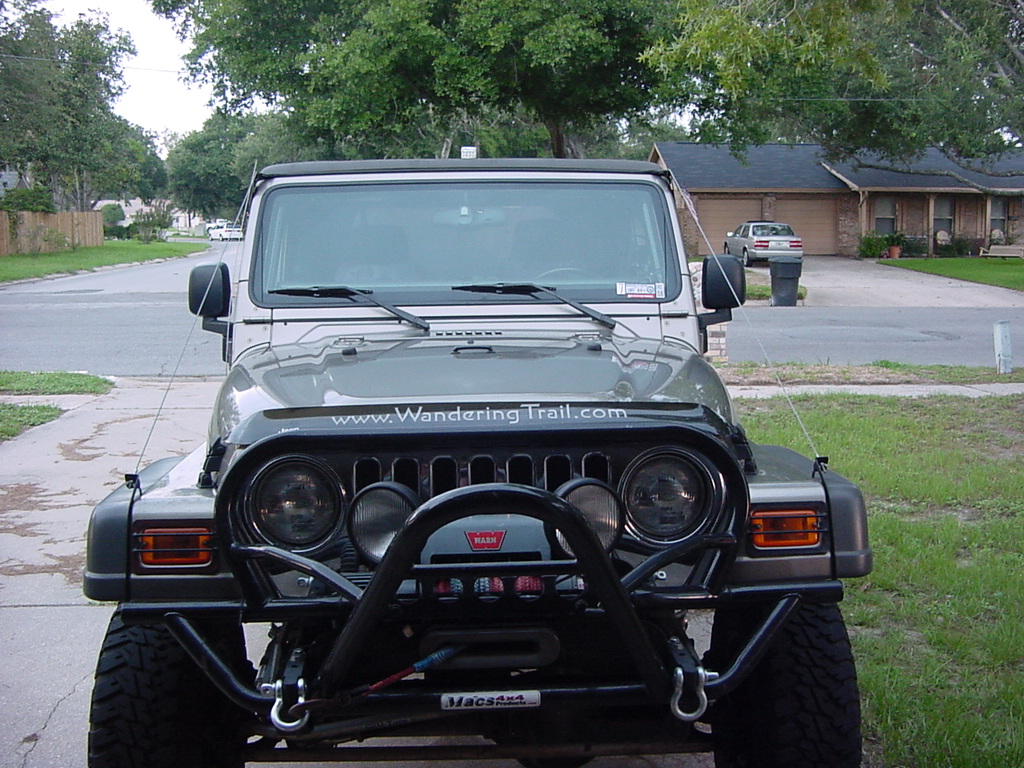
6. Attach cable as shown
in the following photos. Note that the cable goes DOWNWARD through
the
top hole and comes UPWARD where it hooks the cable stop.
This is wrong
This is correct
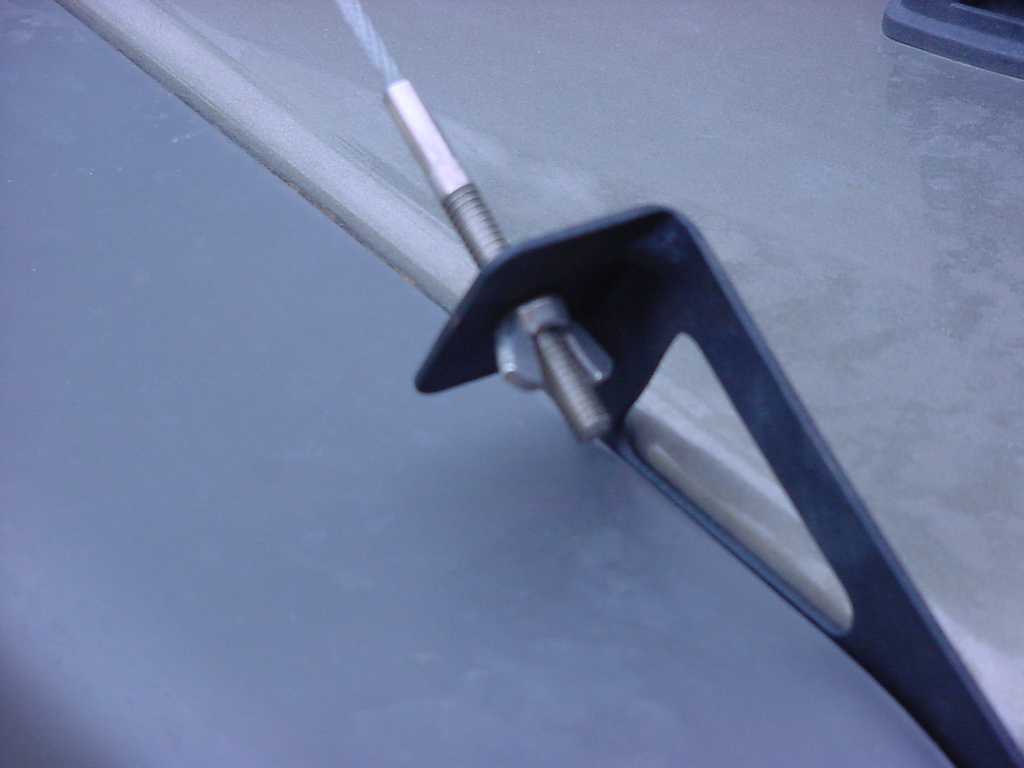
7. Run the
threaded cable end through the hole in the fender bracket and secure
with the wing nut,
DO NOT over tighten. If you tighten to much and your windshield is
not secured to the roll cage, you can pull it forward.
8. A black
nylon tie is also included to attach your radio antenna to the passenger
side bracket. Leave the tie loose, so the antenna will not directly
touch the metal bracket.
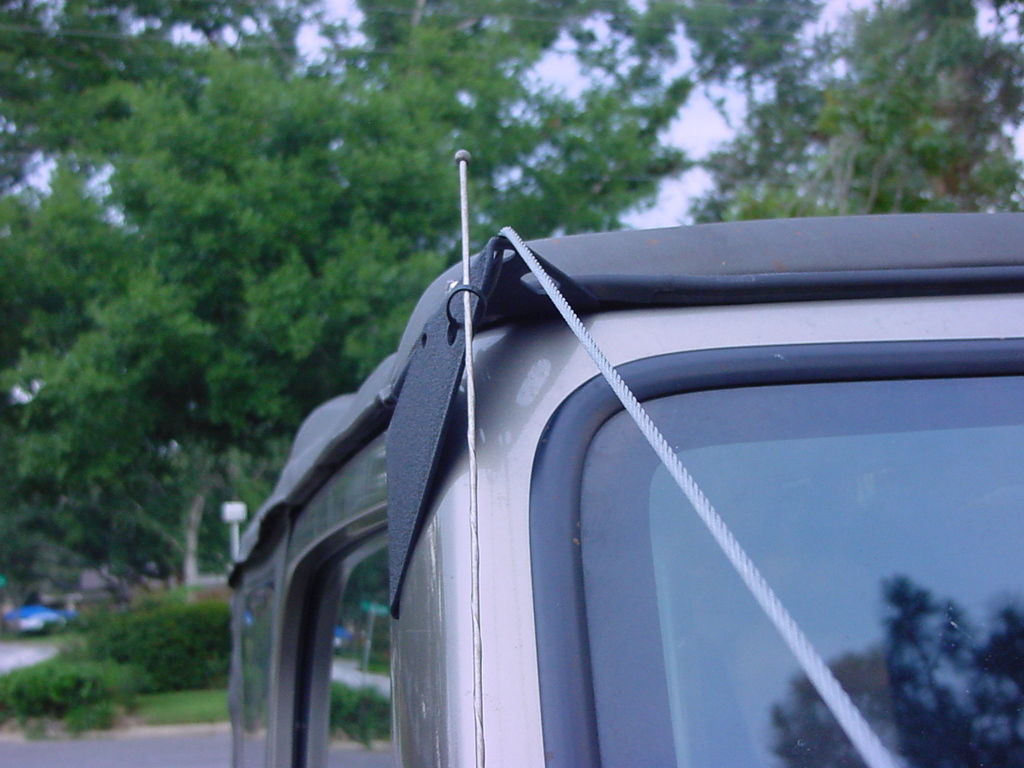
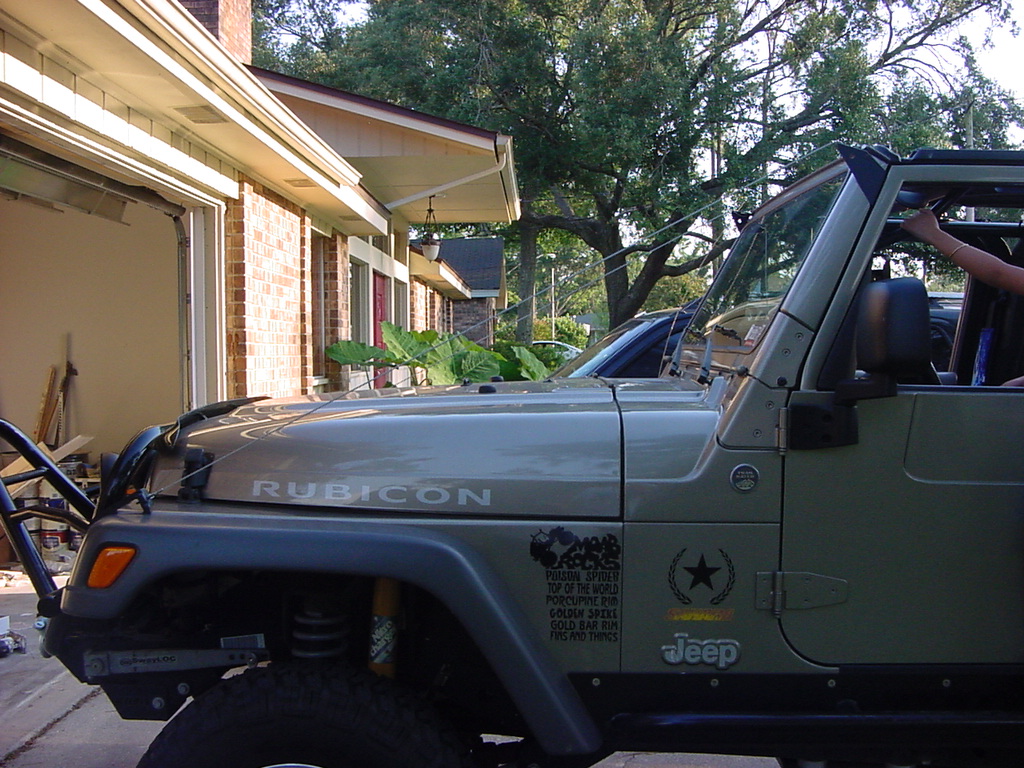
This is what they look like installed.
Opinion: They actually work really well.
I expected them to hum on the freeway, but they are really quiet. They
do take a little bit of getting used to at first since they are out in
your field of vision, but after a couple of days you don't even see them
anymore. I did discover a few items to watch out for.
1. If you do not have a stock roll cage in, or your cage does not secure
the top of the window in place, be really careful on how tight you make
the wires. You can pull your windshield forward. This can also be affected
by any really large branch that you run into off road..
2. You will not be able to open your hood without scratching the sides
of it up, no matter which way you install the fender brackets.
3. If you live in an area with lots of birds... well you get the picture.
I took these things off and threw them into the "Not
really worth the price pile." To be fair about them, they
do work for the purpose intended, but at the expense of scratching your
hood every time you need to open it or having to take them off so that
you don't.