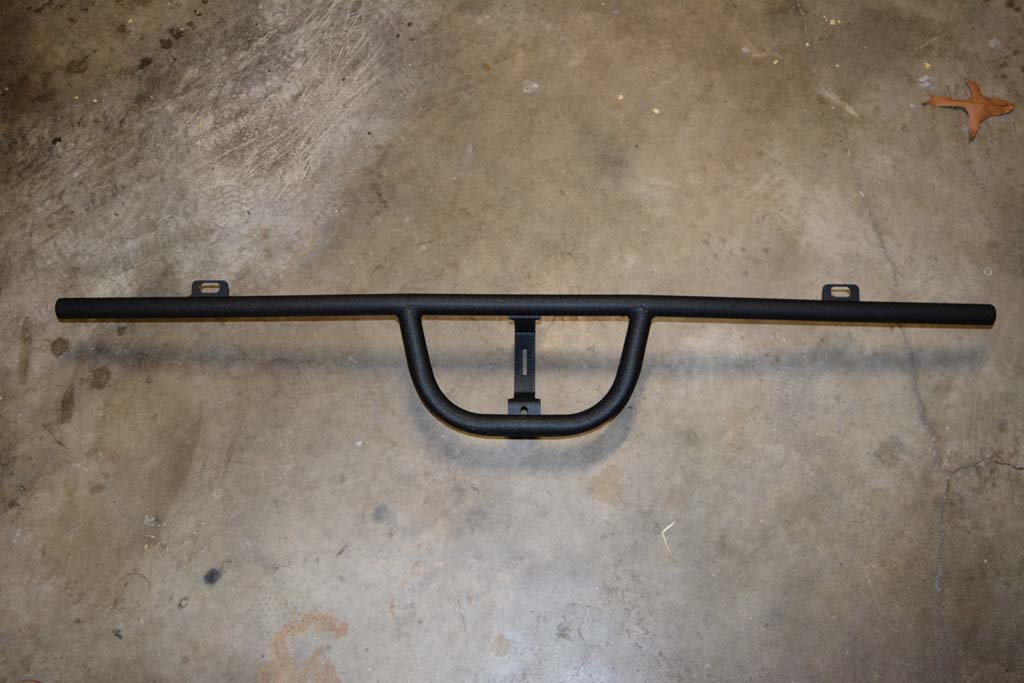
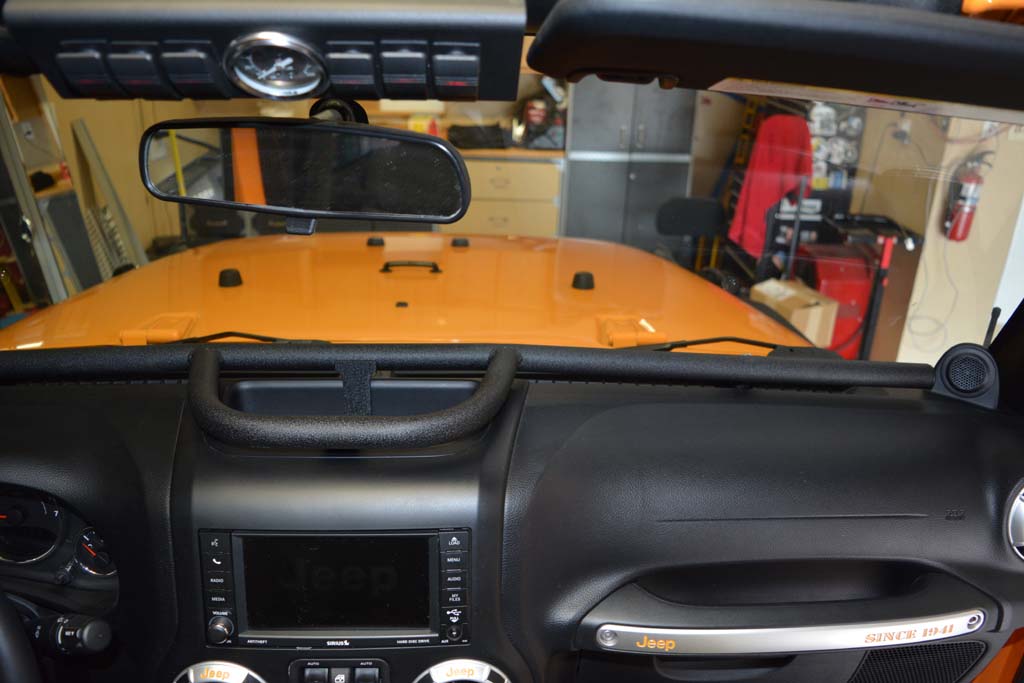
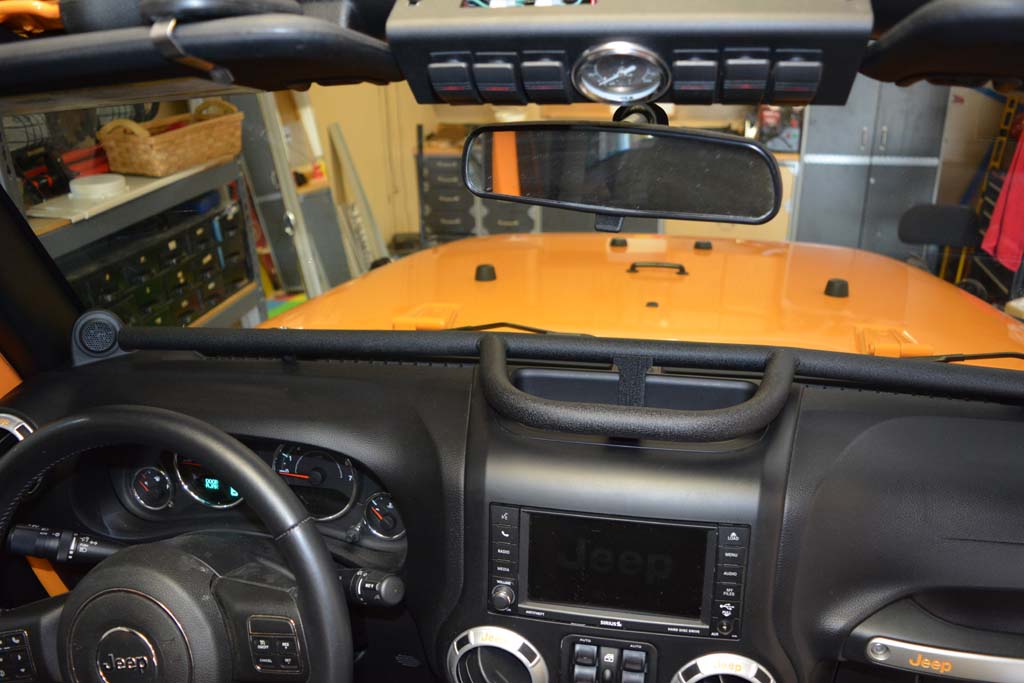
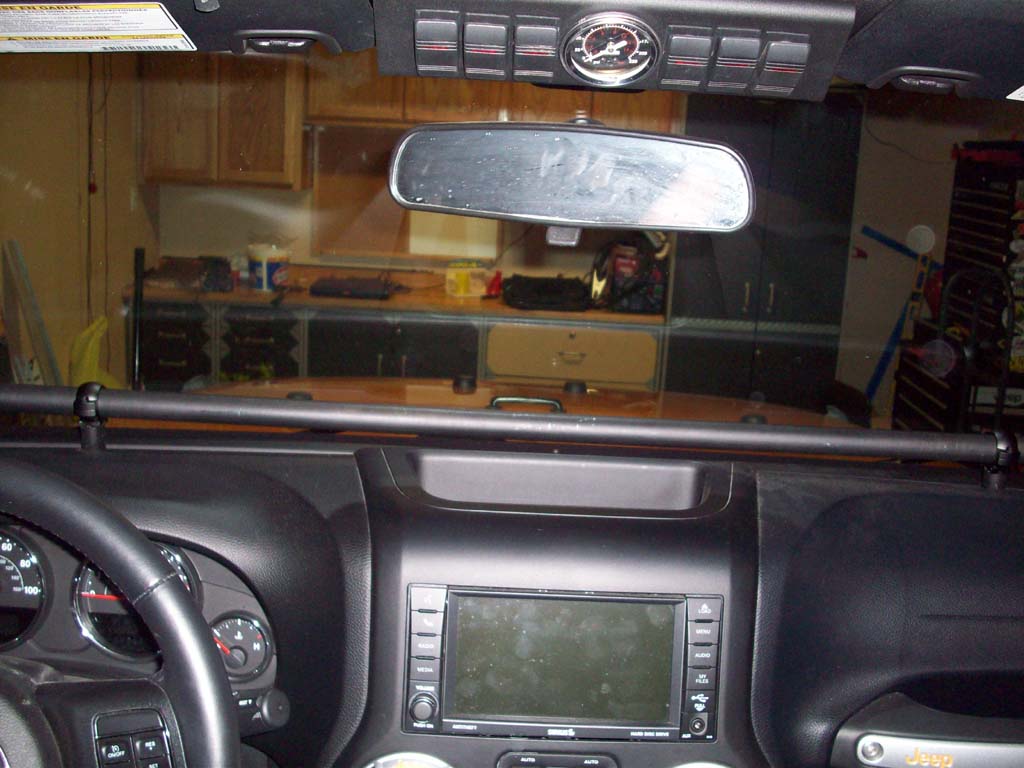
A while ago I had fabricated my own dash bar for the Jeep, but it had a few limitations that I wanted to address, but they required some tube bending, fishmouthing and welding. I wasn't really feeling up to doing that. I already knew that Vector Offroad had come out with their extended version of the dash bar for the 2012 and Up JK's. So I ditched my bar and installed theirs.
Additional
Parts: Painters tape
Tools
Needed:
Trim pry bar, or small flat tip screwdriver
5/32" Allen Wrench
7mm Socket
Ratchet
Extension
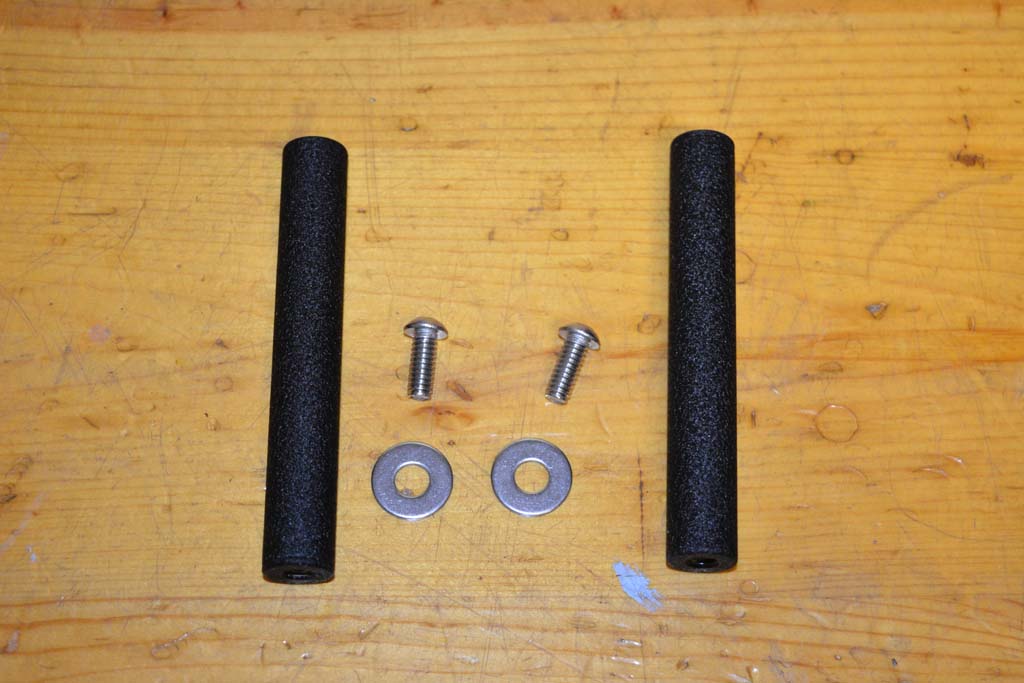
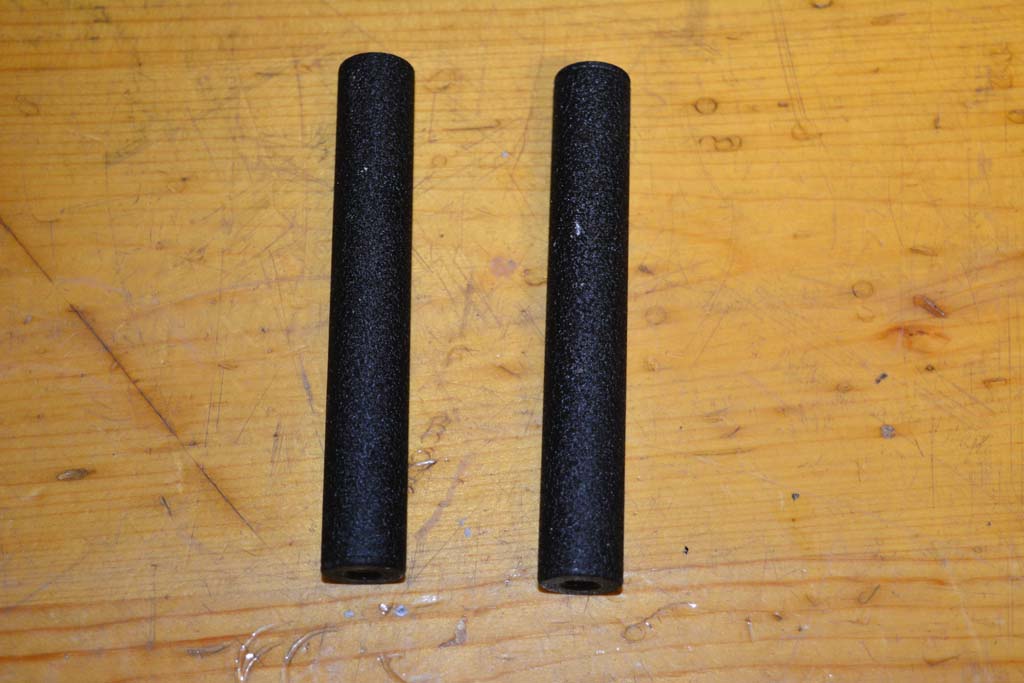
The parts that were in the box, no instructions, so I needed to go online and get them. You should have a dash bar, two standoffs, two 1/4"-20 button head screws and two 1/4" washers. Would it be to hard to print off some instructions and stuff them in the box?
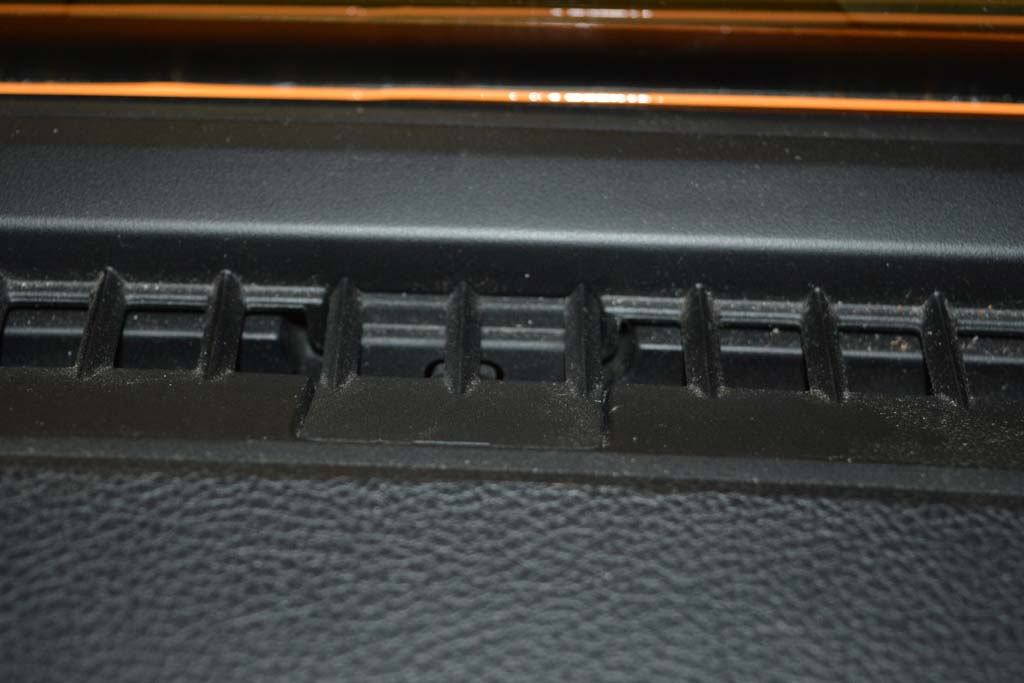
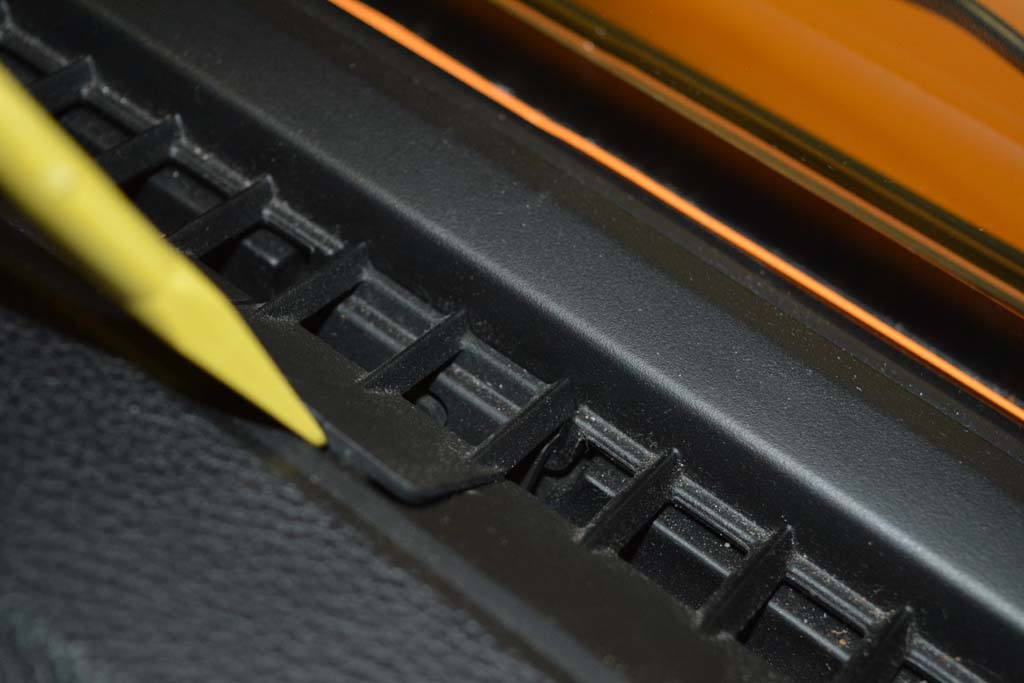
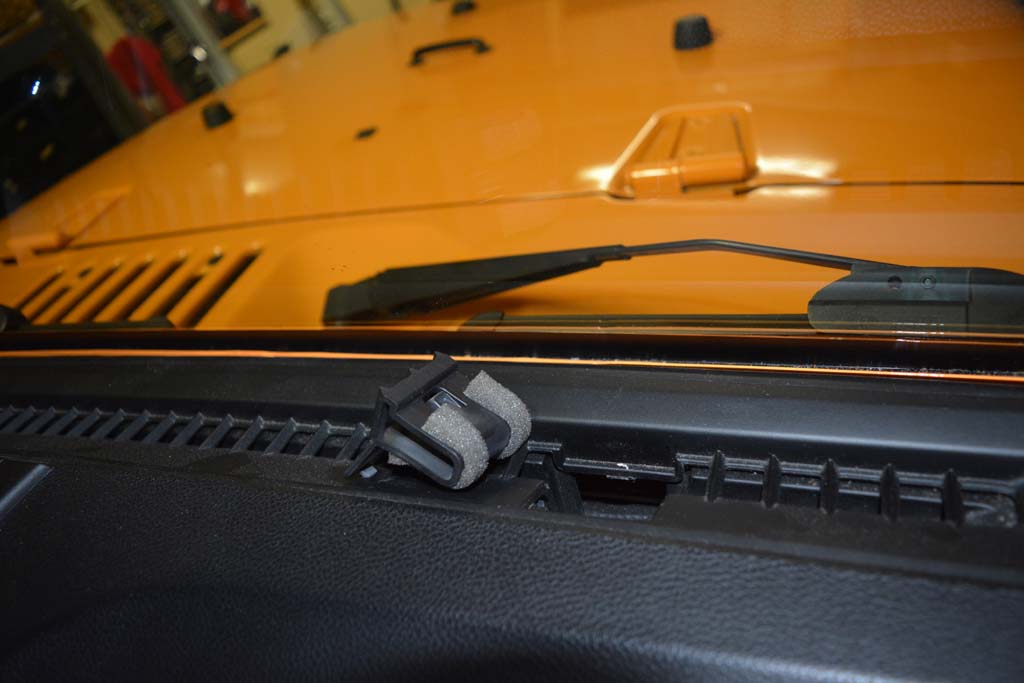
1. Remove the two plastic covers from the dash with a trim pry bar. You can use a small flat tip screwdriver to get this out, but you might scratch up the dash. Put these plastic covers somewhere you can find them in the future. I know small plastic parts are like that one sock in the dryer.
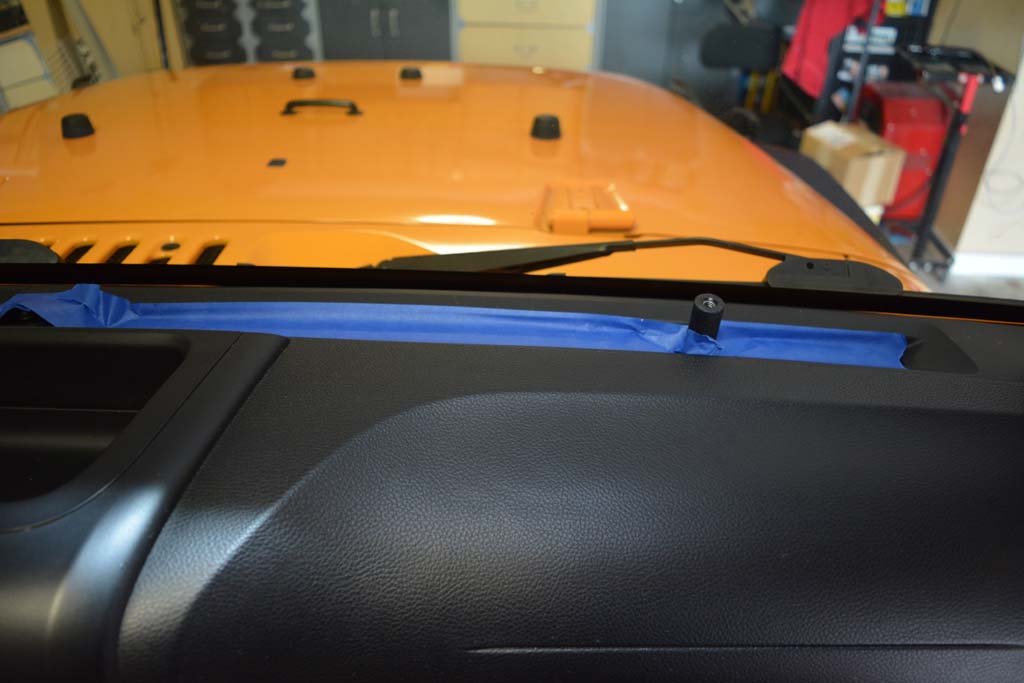
2. I used the supplied screws to make sure I had the right side of the standoff's. I recommend removing these screws before you screw the stand off into the dash. There is a slight depression on one side of the standoff. The powdercoating pretty much covers it up. The instructions say two groves, but there's only 1 covered up grove. This is the side that goes down into the dash and screws onto the 6m-1.00 screw.
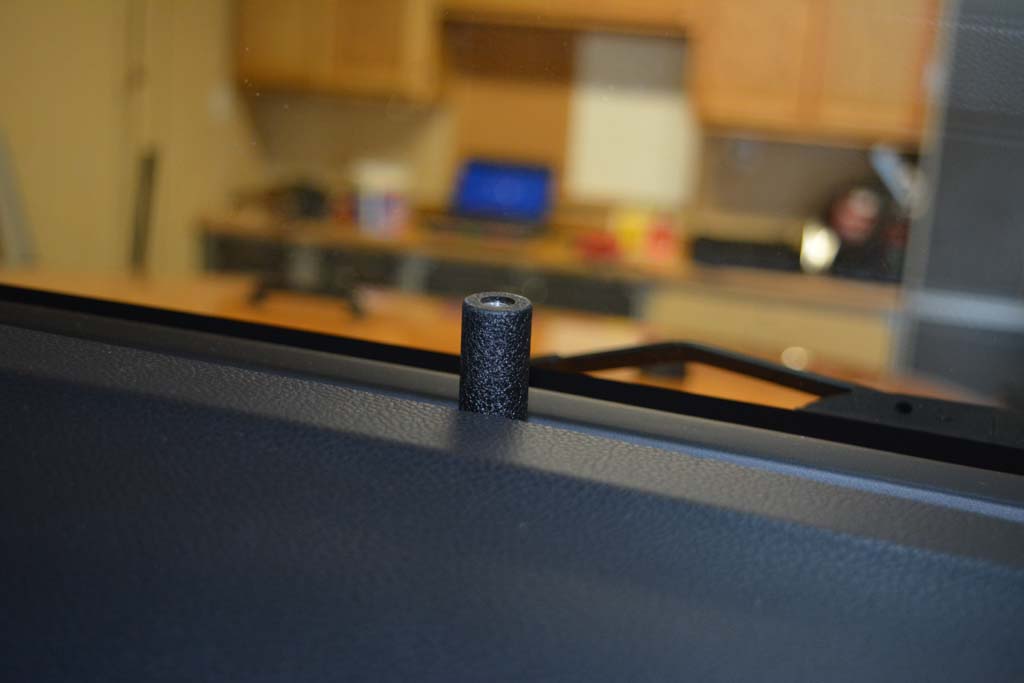
3. Screw the standoffs onto the screw under the dash. The standoffs have two different size threads. You need the 6M-1.00 side.
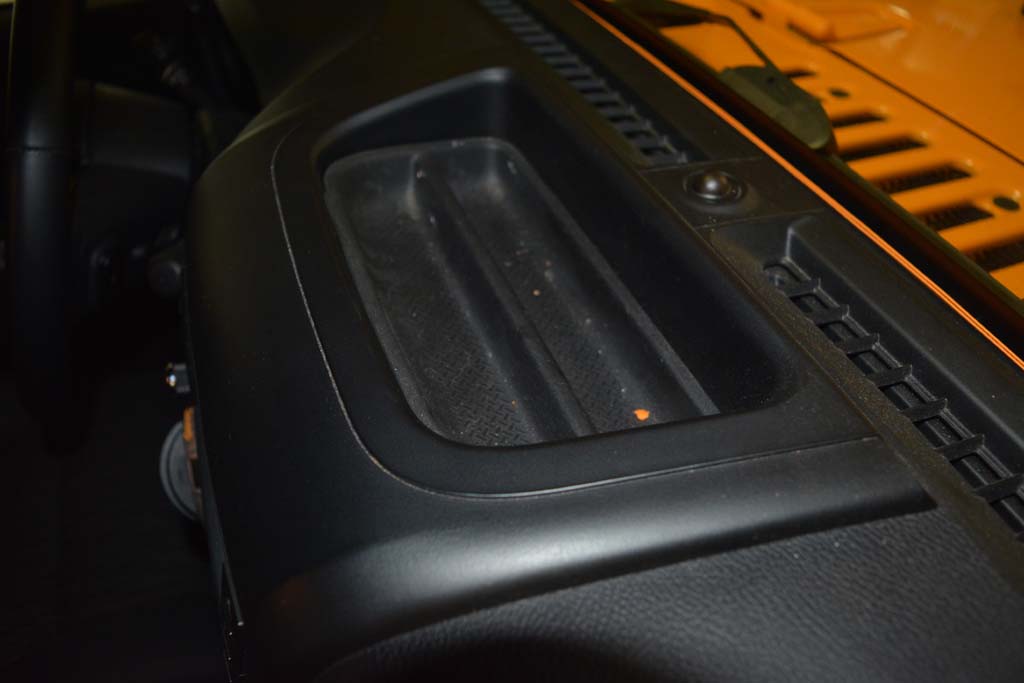
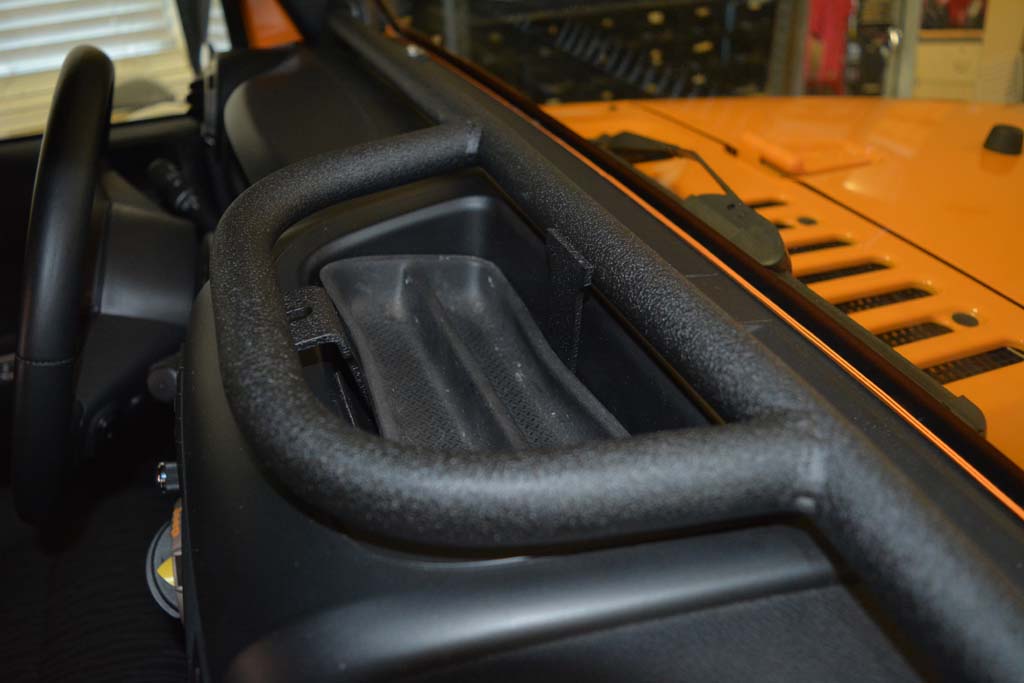
4. Remove the rubber liner from the dash top cubby. I recommend putting this with the other pieces from the dash so you don't lose them.
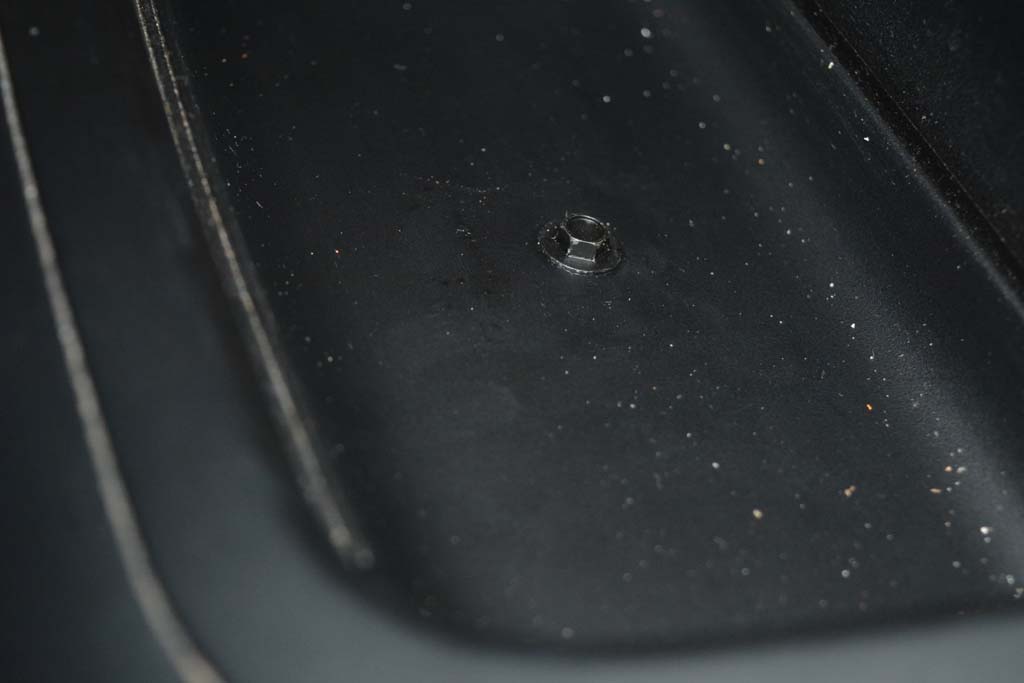
5. Remove the screw from under the liner. You will need a 7mm socket.
6. Cover the slots in the dash with some tape, so that you don't lose anything down into the black hole of the dash.
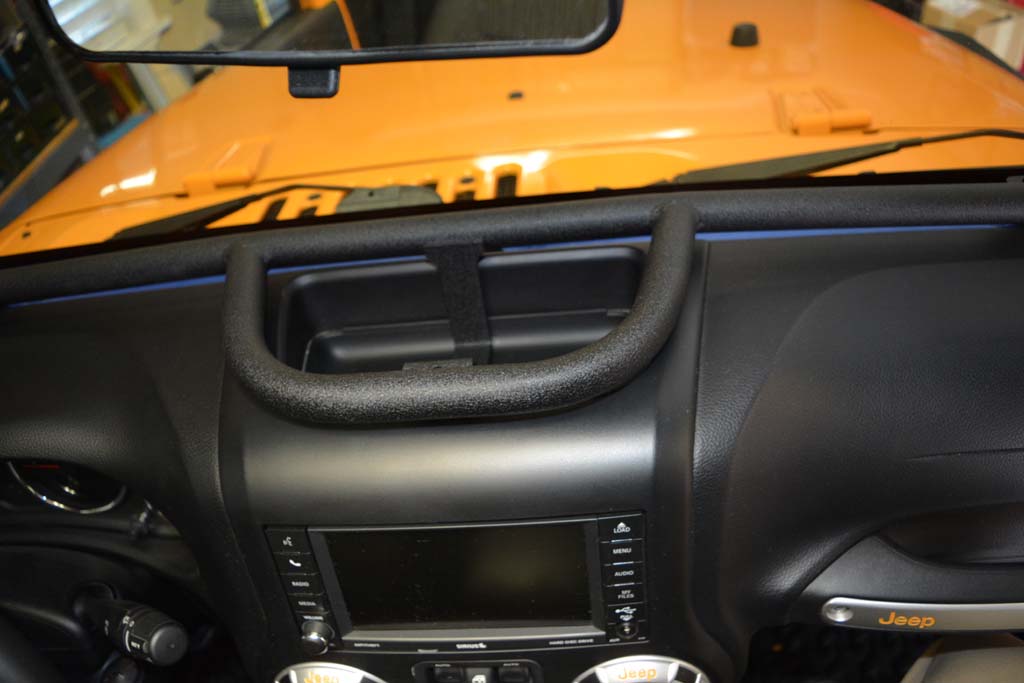
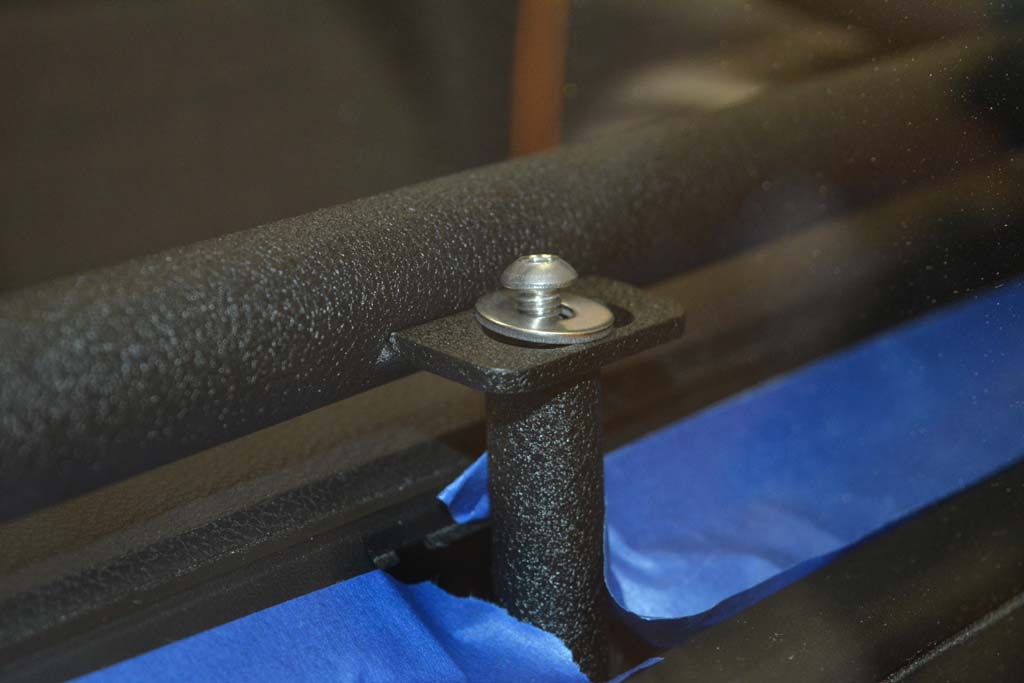
7. Place the dash bar over the stand offs and the center dash. The standoff will fit inside the slots in the tabs on the back of the dash bar.
8. Loosely install the two supplied screws through the dash bar and into the standoffs. Install the screw into the centerdash.
9. Line up the dash bar and tighten the screws. You will need a 7mm socket for the dash cubby and a 5/32" allen wrench for the 1/4"-20 button head screws. Tighten the center dash cubby screw first, then the standoff screws. Do not overtighten the center dash cubby screw.
Final Thoughts:
The instructions don't quite represent what is in the package and in a few pictures still show the older dash bar. The product itself is pretty good. It didn't quite line up perfectly, if you layed the cubby section flat in the cubby the tabs didn't reach to the stand offs, but once you get the standoffs in the slot and install the screw in the dash cubby it's pretty solid. Everything does line up, its just the support in the center cubby that is off a little on the angle. The slots in the tabs on the dash bar fit over the standoffs, but the standoff doesn't slide through, so it looks a little weird when you install it. The picture in the instructions shows a tab with a much smaller slot in it. Overall this is a very nice product. I will update this once I see how all of the RAM Mounts fit and how everything rides.
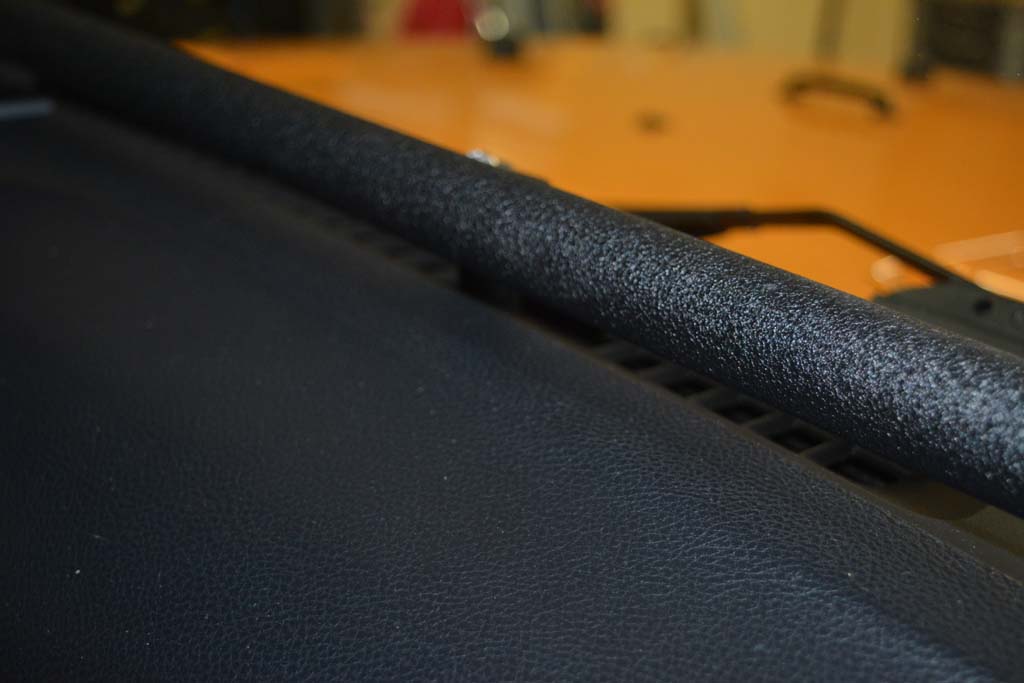
I do like that the textured powdercoat is pretty close to the pattern on the dash.
You can put the rubber tray back in the cubby, but it really doesn't fit. You could cut it with a knife to fit around the bars if you really need it. I did toss a water bottle up there and it stayed upright for a while before falling over while I was driving, so the extra height does help.


