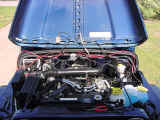
I never liked putting wire taps on wire, tapping into a fuse, or
even cutting wires to install accessories. I also hate things that look
like they were just thrown together. Now I knew that I was putting in
accessories like a CB, rock lights, and who knows what else. I remembered
that Jeep used to have a unswitched and a switched wire located by the fuse box
so that you could tap into the electrical system nice and easy. Well I
couldn't find them, so I looked in the FSM and it appears that Jeep decided to
remove them. I did hear all sorts of stories about why, but they just
aren't there. So I needed to come up with another way to provide
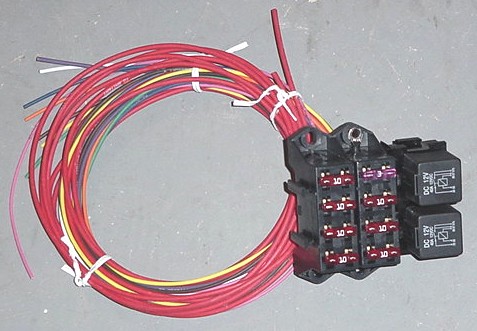
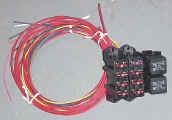
power. I looked to painless wiring to supply me with a waterproof 7
circuit wiring boss. I decided on going with 7 ignition hot circuits for
the simple fact of hating dead batteries. Now all I needed to
do is find me a switched circuit to power power the relays on this boss.
| Installation: |
| 1. I took the circuit boss out of the package and spent the next
few minutes untangling all the wires. I am always amazed at
no matter how careful you package something it always seems to get
tangled up. |
 |
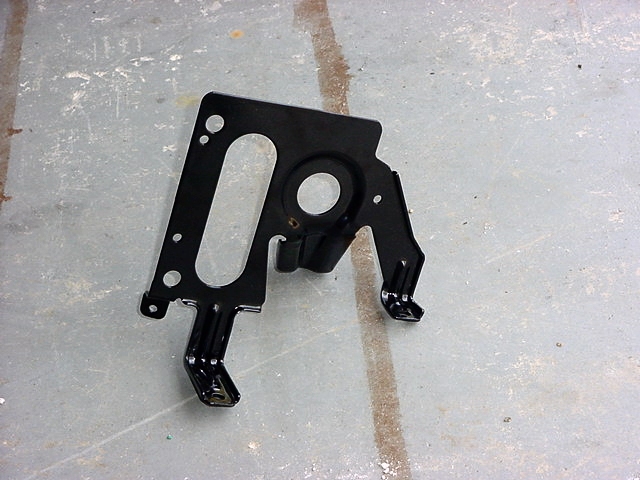
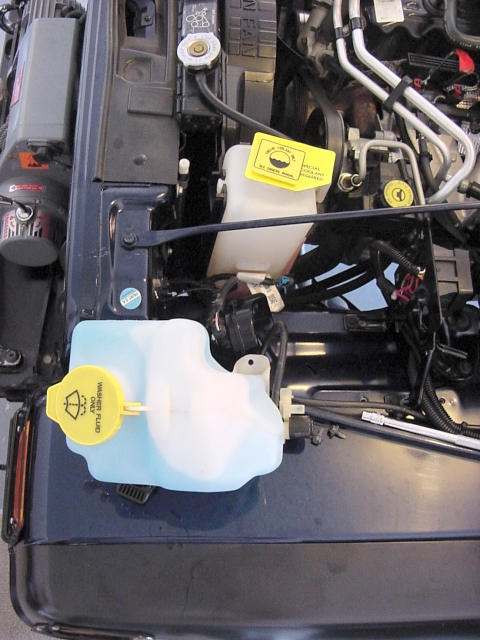
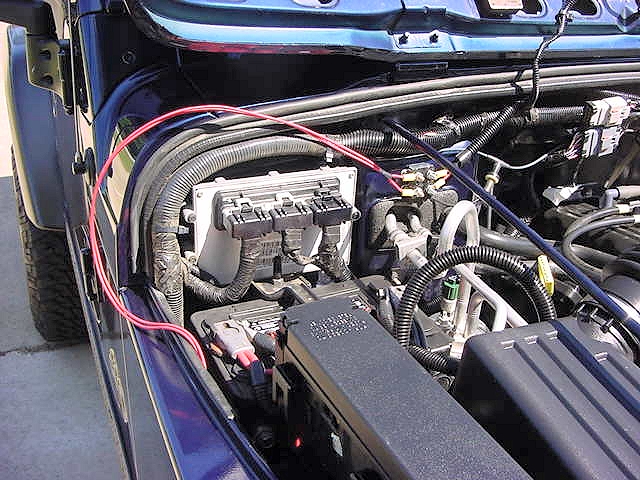
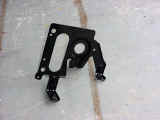
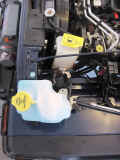
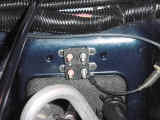
| 2. One of the hard parts of this installation is finding a location to
put it. Since I have a manual, I have an open area right behind
the Washer fluid bottle. For those of you with Auto's, this
is taken up by a controller. The bracket for the computer looked
just perfect for the job and it was cheap, less than $14. |
 |
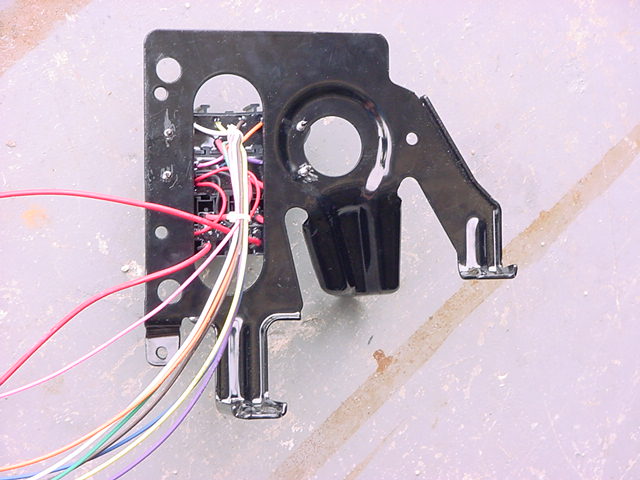
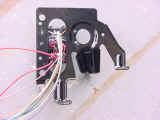
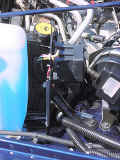
| 3. I located the circuit boss in the large oval opening and drilled
(4) 3/64" holes in the bracket and then mounted the circuit boss
with the supplied self taping screws. I used a Dremel to cut
the ends of these off after they were tight. |
 |
 |
 |
| 4. Now I had to remove the washer fluid tank to get one of the bolts
for the bracket installed, so remove the (2) hold down screws with
a 10mm socket and a long extension. I also had to unclip the
pump harness to swing the tank out of the way. |
 |
| 5. I mounted the Auto computer bracket with the (3) body bolts (10mm
socket). These were a real pain to get in. I ended up
running another bolt (Coarse thread) down through the hole before
I put these in. |
 |
 |
| 6. Now reinstall the washer tank, don't forget to reattach the wiring
harness for the pump. |
 |
| 7. I then ran the power leads over to the battery, but did not connect
them. I wrapped these in some wire loom to protect them from
the elements. |
 |
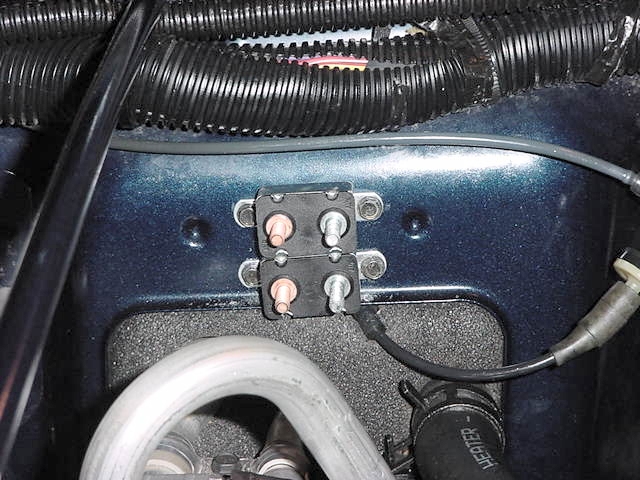
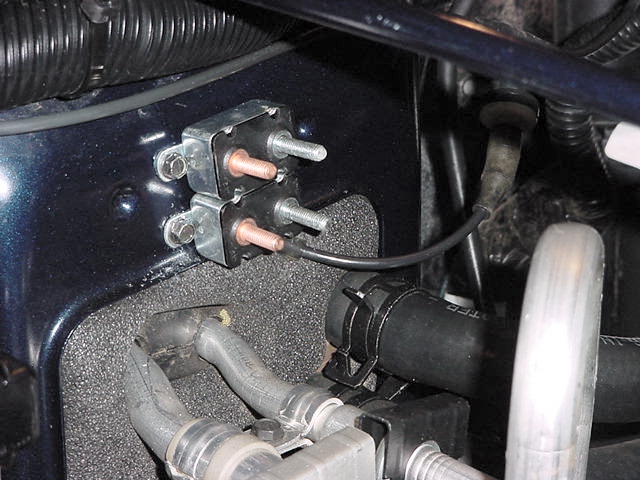
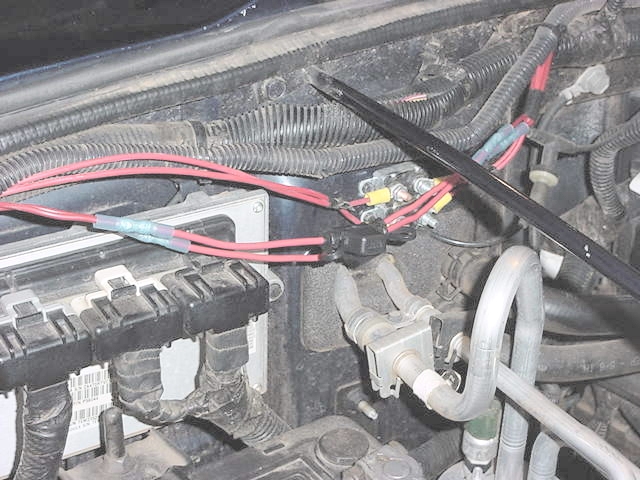
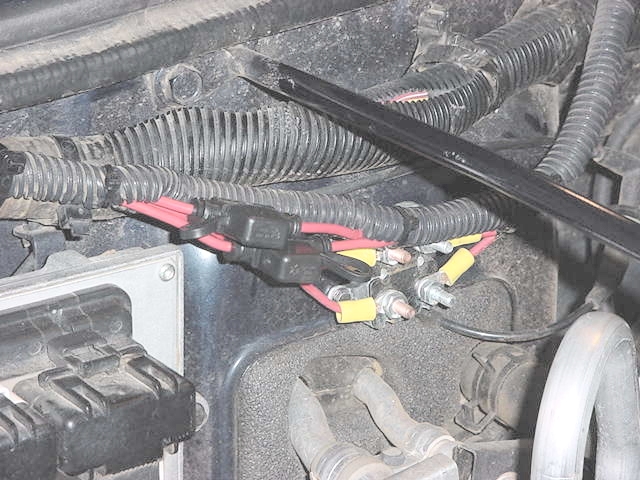
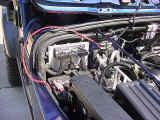
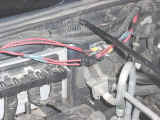
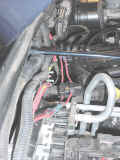
| 8. I needed to find a convenient place to mount the (2) provided
circuit breakers close to the battery. There is a nice flat
spot above the entrance hole for the A/C lines. I took a look
behind the glove box and didn't see anything that I could accidentally
screw into that would cause problems. I could clearly see the
2 dimples from the front side. I placed the battery side of
the circuit breaker towards the battery. I placed the first
circuit breaker right above the opening and screwed it in, then did
the second one right on top of it. Once these were installed
it was simple to just cut the power wire to the proper length and
connect it to the circuit breaker and battery. |
 |
 |
 |
 |
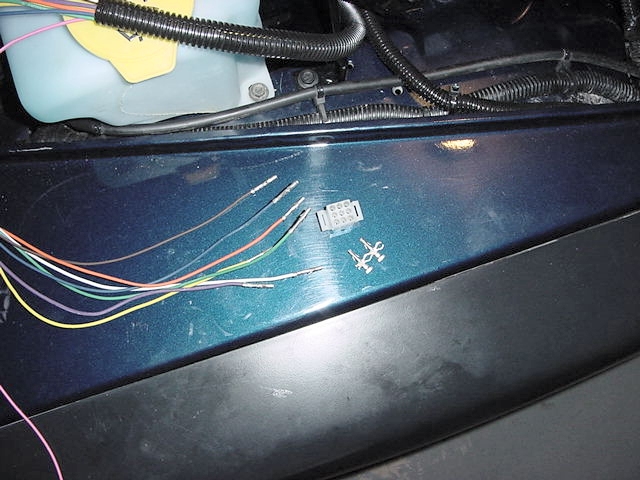
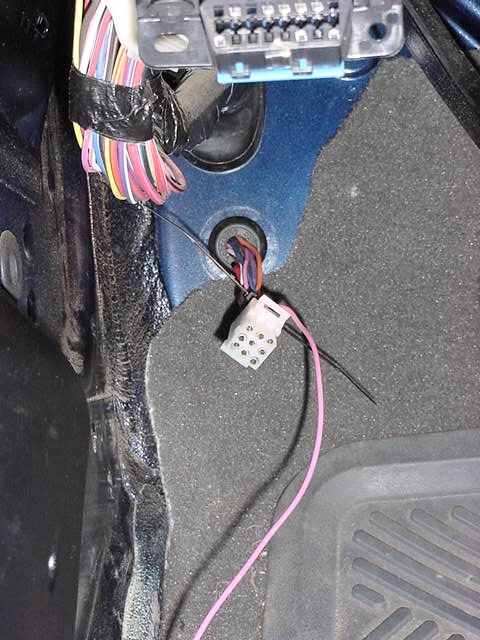
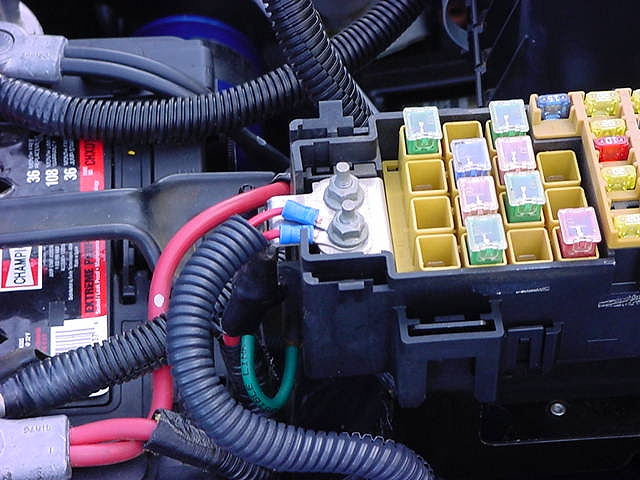
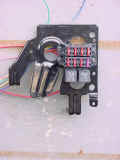
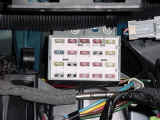
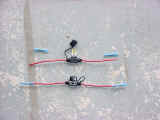
| 9. The wires were already marked as to which fuse they went to on the
circuit boss. I marked the fuse cover so that I knew which fuse
went to which wire. This would help later as I hooked up equipment.
I had purchased a 9 wire connector from Radio Shack so I crimped the
connector ends onto the wires. No since I had only 7 wires coming
from the circuit boss, but I had 9 spaces I decided to run 2 additional
constant power sources from the battery over to this connector.
I did not connect these to the battery yet. |
 |
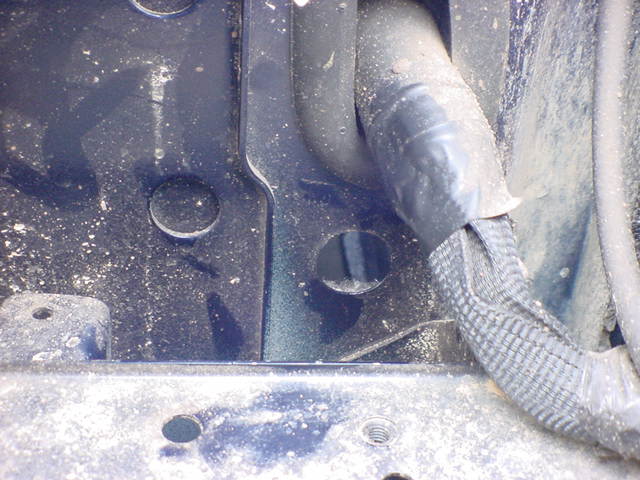
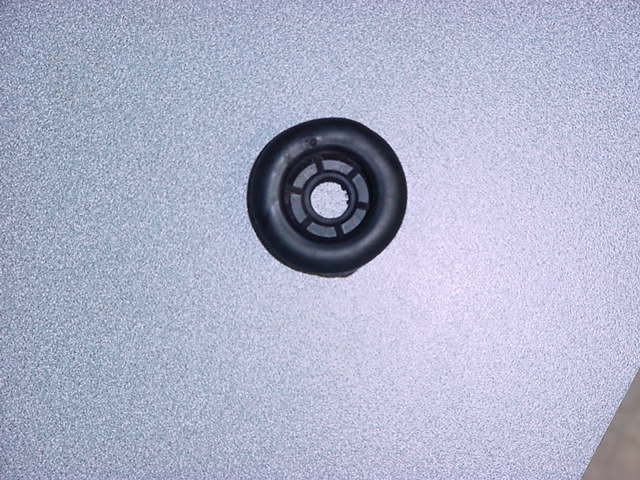
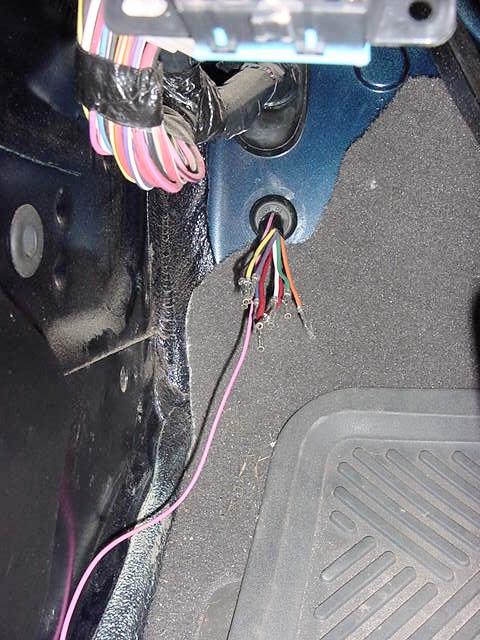
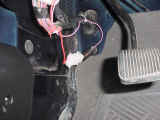
| 10. Now I carefully tapped the remaining wires together. I ran these
along the edge of the hood. You will notice a rubber plug below
the brake booster. The plug has a small round dimple in the
center of it, so I used the Dremel to cut this out and ran the wires
inside the cab. |
|
|
|
|
| 11. I then installed the wires into the connector. The connector
is marked with numbers so that you can install them in sequence.
The constant hot became #8 and 9. |
 |
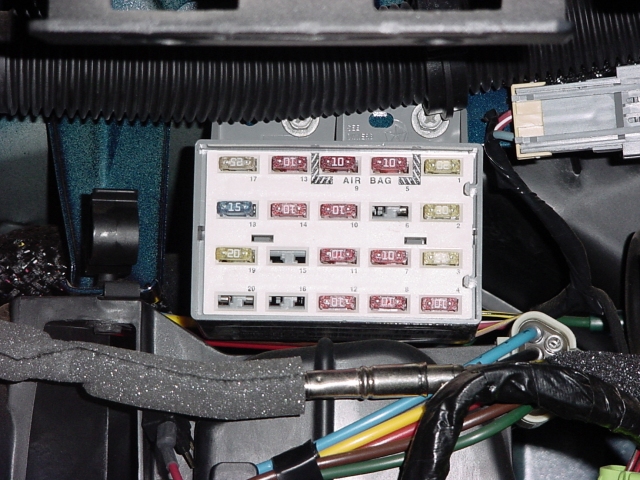
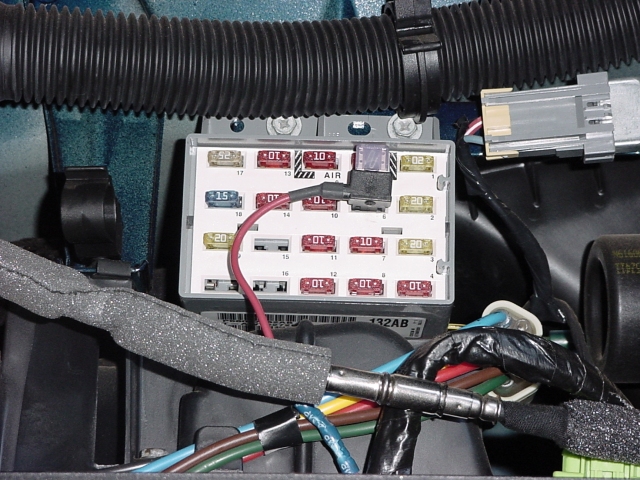
| 12.
I needed to run a switched power to the pink wire so that I could
activate the relays on the circuit boss. The boss comes with
a fuse tap for the larger bladed fuses, well since I had mini fuses
this wouldn't work. I did find a mini fuse tap, that actually
allows you to tap an existing circuit, keep it fused and actually
have an additional fuse for the what ever you are powering.
Since I didn't have the hard top installed, I still had the power
leads ran to the fuse box for the rear wiper and defroster, just no
leads from the fuse box. I decided to not disturb any other
circuits and just install the tap into this location. |
| |
 |
 |
 |
| 13.
After I double checked all connections, I turned the ignition switch
on checked for power at the connector. I then wired up the 2
constant power leads to the terminal in the main fuse box and checked
for power. The nuts on the lug takes a 10mm socket to remove. |
 |
| 14. Now
all I needed to do was run power from my accessories to the other
connector and I could just plug them as needed. The only bad
thing about this is when you disconnect the connectors, you disconnect
all your accessories from power. |
 |
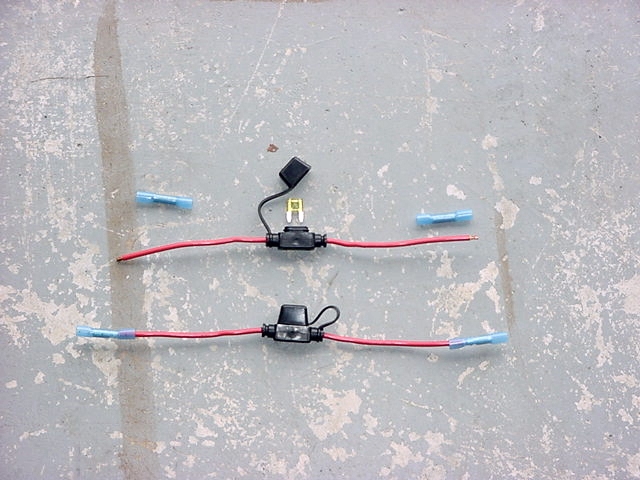
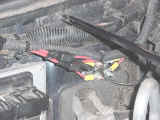
| 15. I realized that I didn't install any fuses on my constant hot leads,
so I opened up the wire loom again and installed 2 waterproof fuses
holders. These holders use the same mini fuse as are in the
Jeep, so I'll have spares if needed. These fuses are rated up
to 30amps so should handle about everything that I would be plugging
into them. |
 |
| 16. I used heat shrink connectors to allow for at least a water resistant
connection. |
 |
 |
 |