Control arm drop brackets / Geometry correction brackets always seem to get a bad rap for the simple reason that they drop the factory frame mount position of the lower control arms down a couple inches below the frame. In theory offsetting what you just gained by lifting the Jeep. In practice it's a lot less severe than people make it out to be. Over the years I've hit stock control arms, lifted control arms, long arms, and mount points on all of them. I had wheeled with a friend that had a set of AEV drop brackets on his Jeep and not only did it ride better going down the road, but some of the objects we drove over on the trail were easier to get a tire up on with his Jeep vice mine. I decided that since I wanted to inmprove my drive around town for the most part since this was my daily drive and going with a long arm kit was expensive at the moment. The drop brackets would put the front control arms into about the same position as a long arm. The long arm would have a few more advantages. I looked around at the different drop brackets on the market and saw that most of them were stamped steel that you had to assemble with spacers. I wanted something more solid, so I decided that I would pick up a set of the JKS control arm drop brackets.This drops the mounting points of both the upper and lower control arm frame mounting points. This helps to correct the control arm geometry that is affected by a lifted Jeep. This also helps to correct the caster on the front axle through the travel arc.
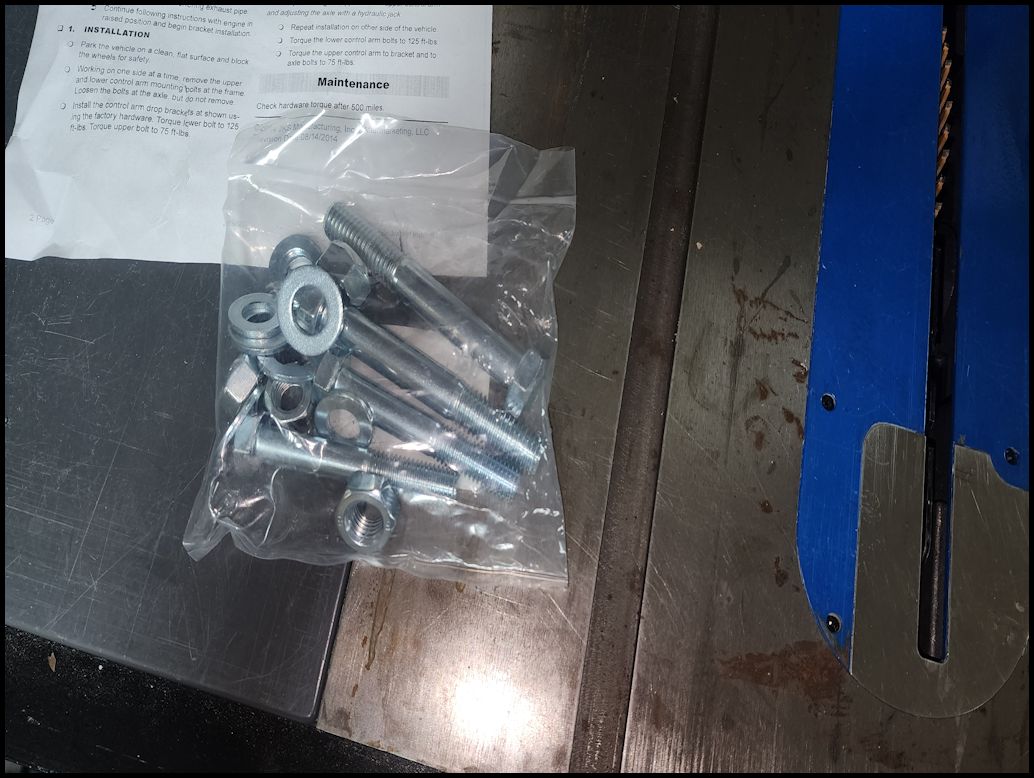
| Parts: |
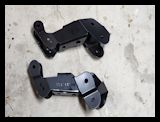
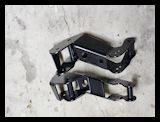
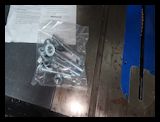
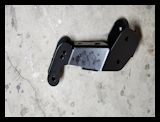
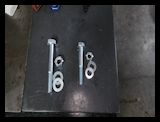
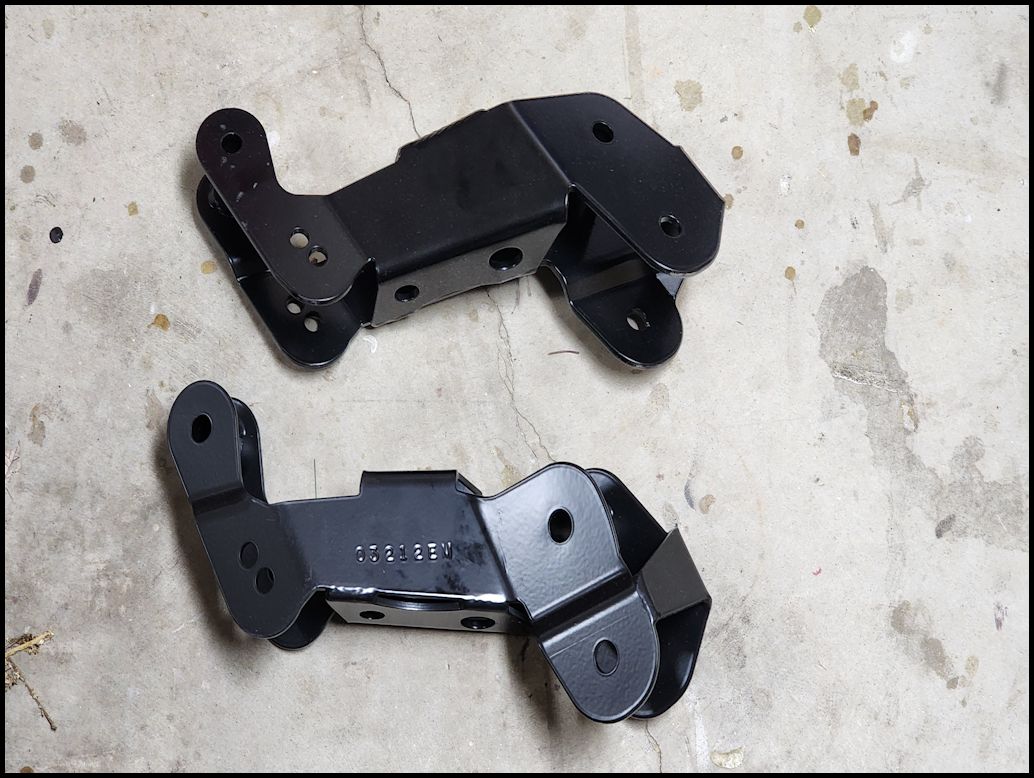
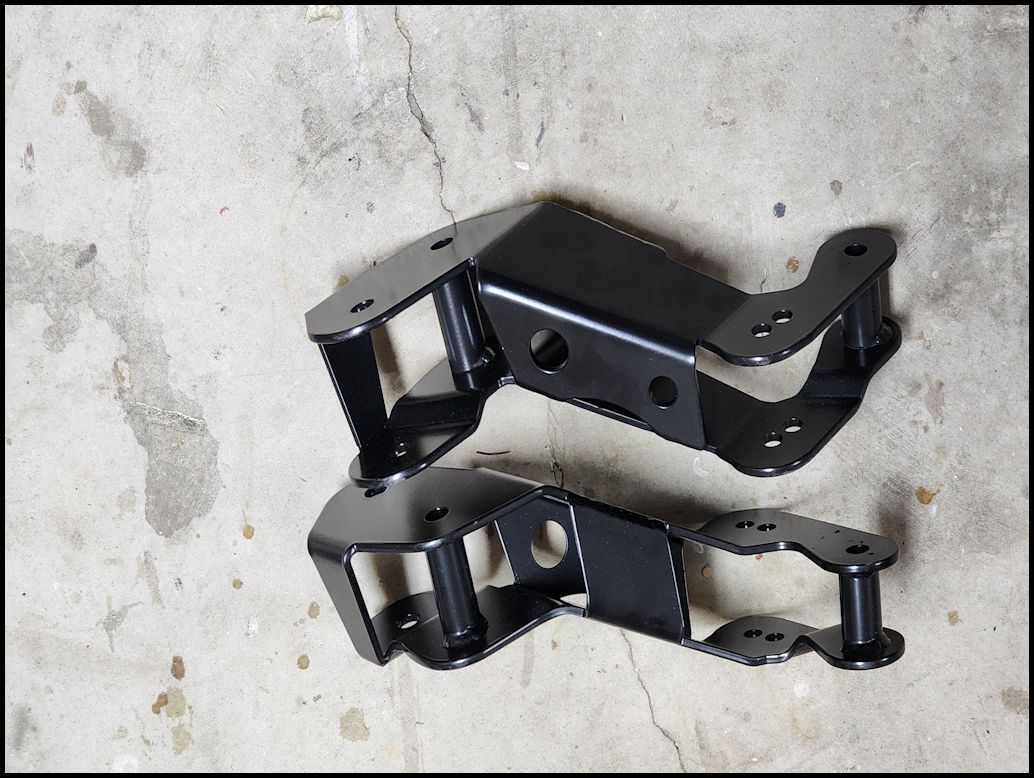
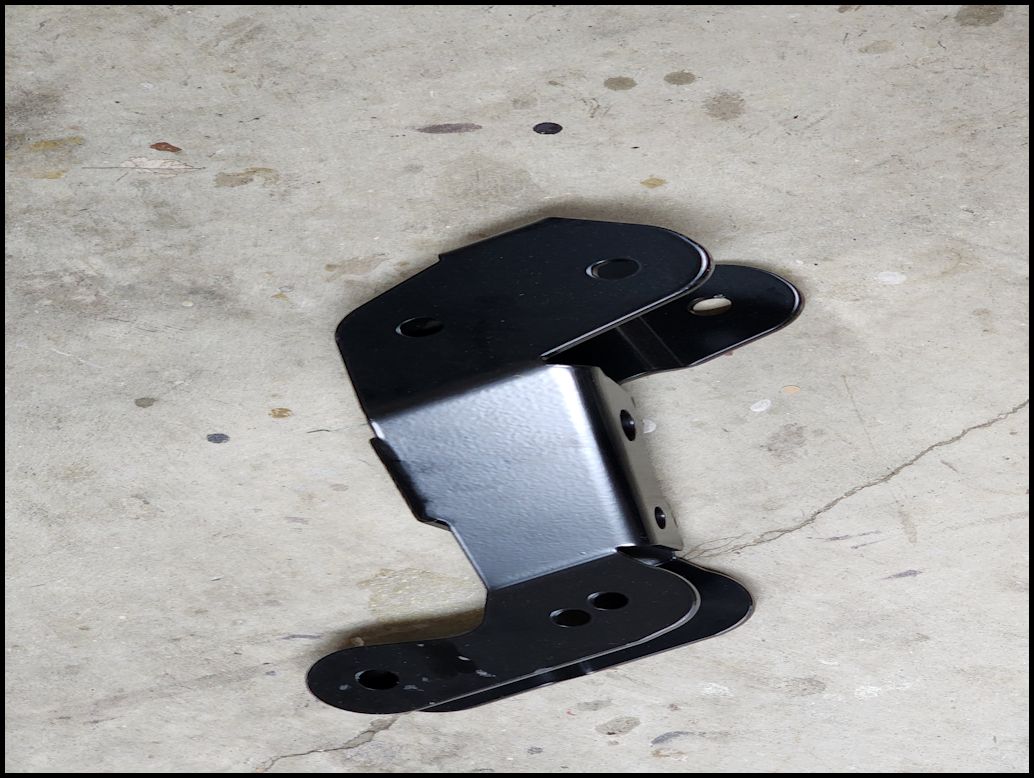
| Two welded steel brackets and a package of new bolts for the control arms. The brackets are stamped steel and welded into one assembly. No pieces you have to put together and try to get up into the OE brackets on the frame without having it fall apart in your hands. |
 |
 |
 |
| |
| Installation: |
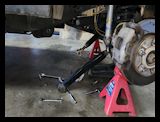
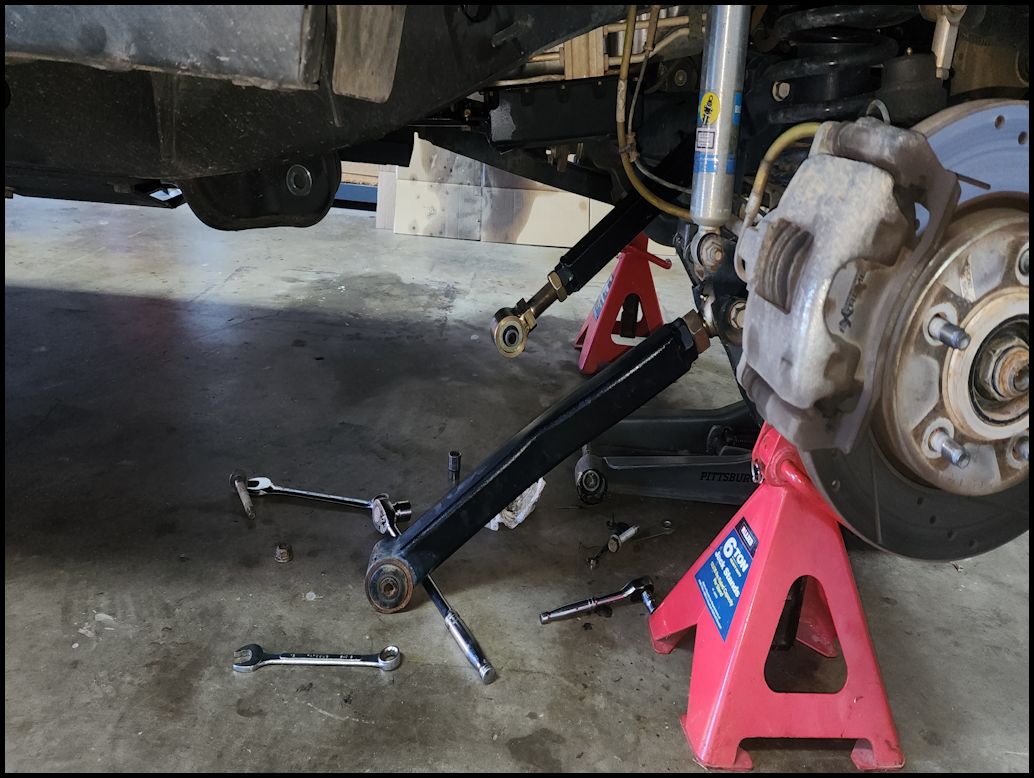
| You can do this installation a few different ways. You can lift the Jeep on a lift and support the front axle with axle jacks, or on the ground with the tires installed, or with the front axle on jack stands and the tires removed. I choose to do it this way, because I don't like having to work around the tires just to reach bolts that are already a pain to get to. Remember to work on a flat surface, chock the rear tires and only work on one side at a time. |
1. Chock the rear tires, lift the front axle and support it on jack stands. Remove the front tires and slide them under the Jeep in front of the rear tires. I do this just as a precaution knowing I'm going to be working under the frame, but you don't have to.. Installation is the same for both sides.
Note: The rest of the install can differ if you have OEM control arms or aftermarket adjustable control arms. |
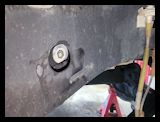
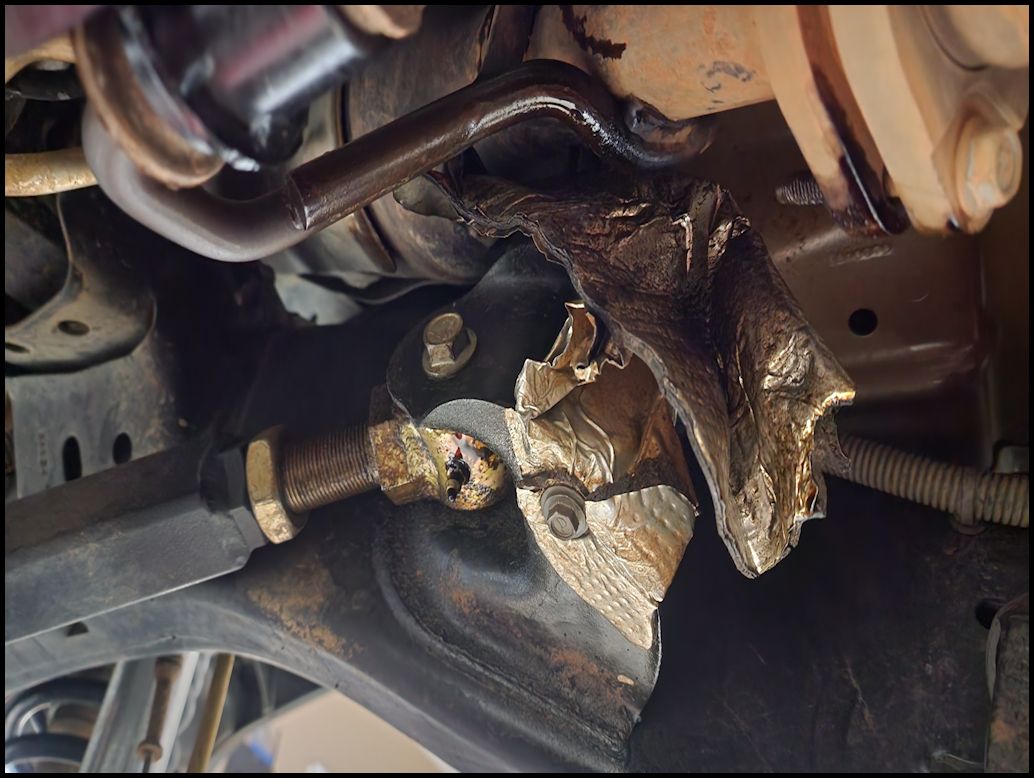
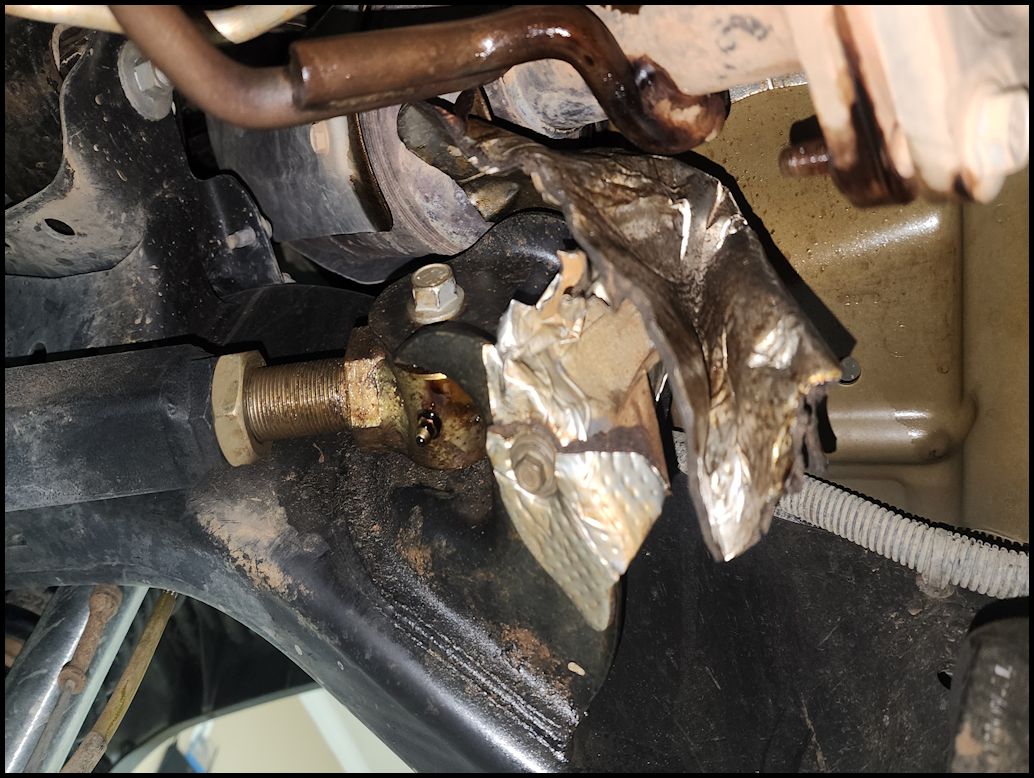
| 2. On both sides remove the heat shield from the frame side upper control arm mount. You will need a 10mm socket and a 10mm combo wrench. There is a bolt holding the heat shield in position on the top and bottom of the bracket. I definetly recommend doing this with the exhaust cold. On the driver side I spent most of my time with my hand pressed against the exhaust. The bolt on my passenger side was driven in and stripped during assembly at the factory, so I ended up cutting and tearing the heat shield to get it removed. |
 |
| 3. Loosen the axle side upper control arm bolts. You will need an 18mm socket and 18mm combo wrench. |
 |
| 4. Loosen the axle side lower control arm bolts. You will need an 21mm socket and 21mm combo wrench. |
 |
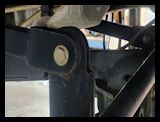
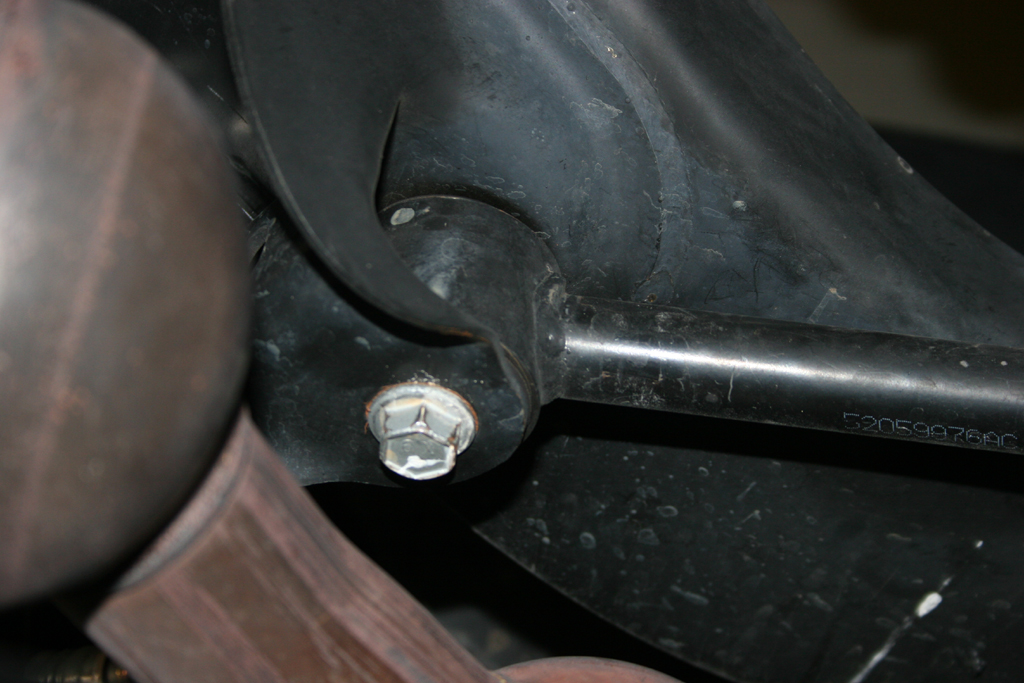
5. Remove the frame side upper control arm bolts. You will need an 18mm socket or 18mm combo wrench. There is a flag nut on the backside of the frame bracket that will drop out when the bolt is removed.
Note: On the 3.8L the bolt will hit the exhaust pipe. You can either cut the bolt and replace it with another, or some people have had success wiggling it free with the control arm completely disconnected. JKS does provide instructions on how to get this bolt out by disconnecting the motor mount. |
 |
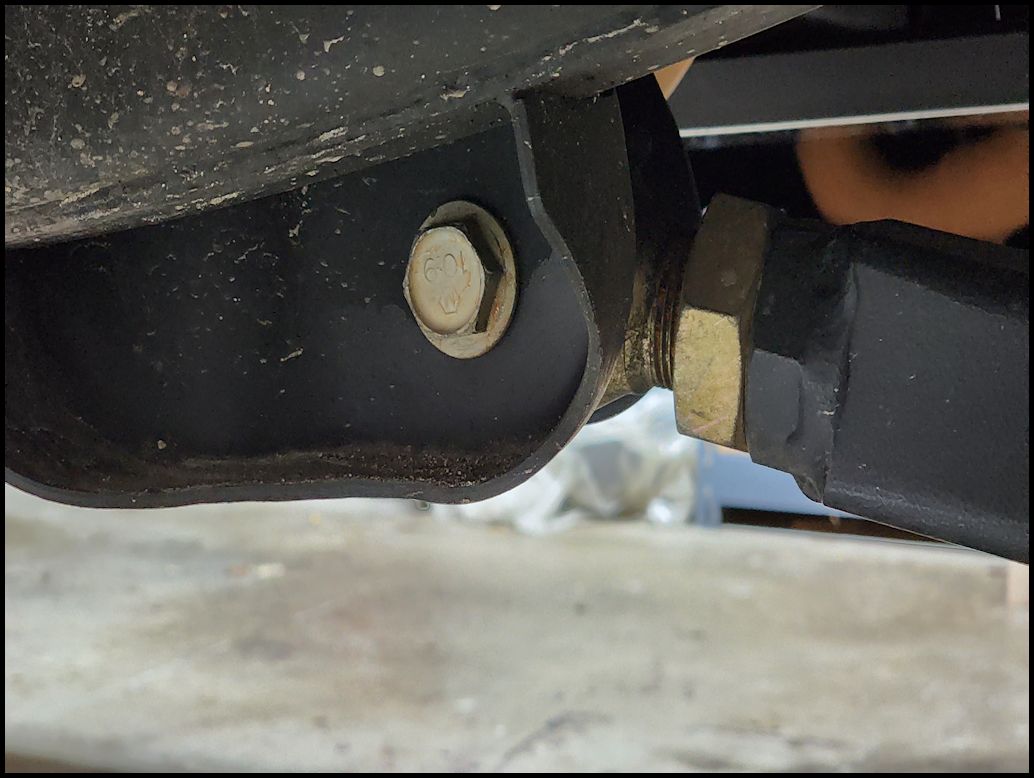
| 6. Remove the frame side lower control arm bolts. You will need an 21mm socket and 21mm combo wrench. |
 |
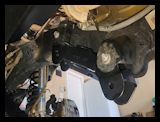
| 7. Allow both the upper and lower control arms to droop out of the way. |
 |
Note: If you have adjustable control arms you will need to make sure that they are set to the same length of the factory control arms. You may need to remove the arms completely to adjust them.
Factory Upper: 18 3/4"
Factory Lower: 22 5/8" |
| There is a left and right bracket.The pictures shows the bracket upside down.The upper control arm mount with the two holes is offset to the inside of the frame. |
 |
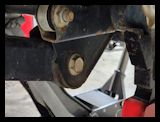
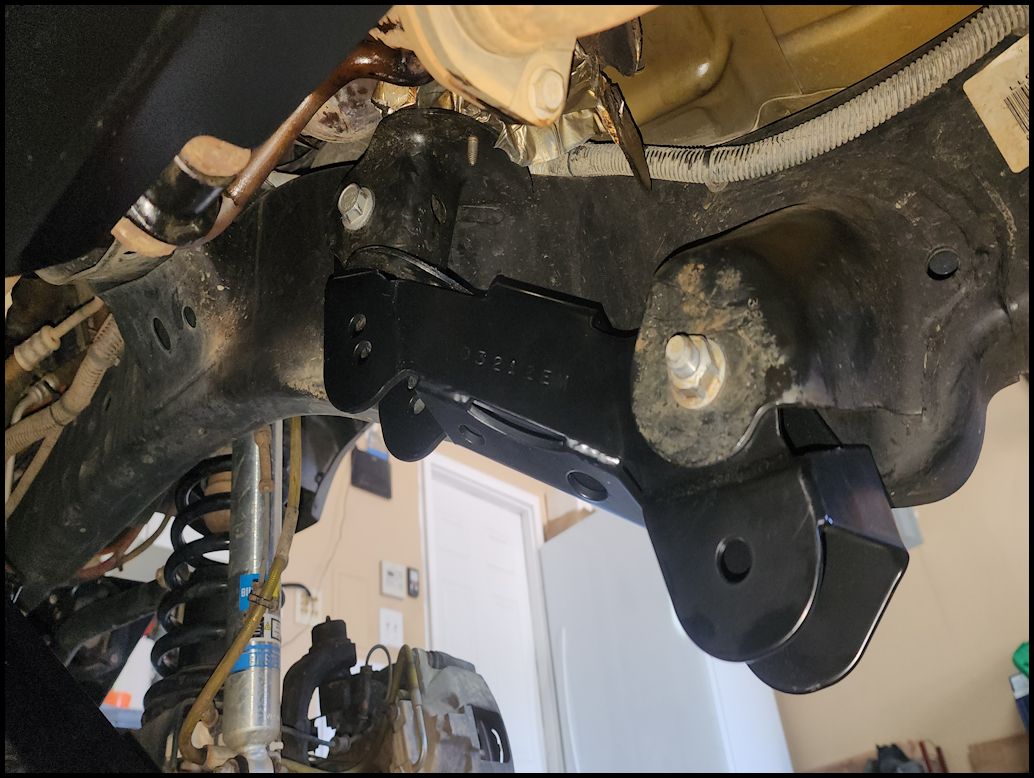
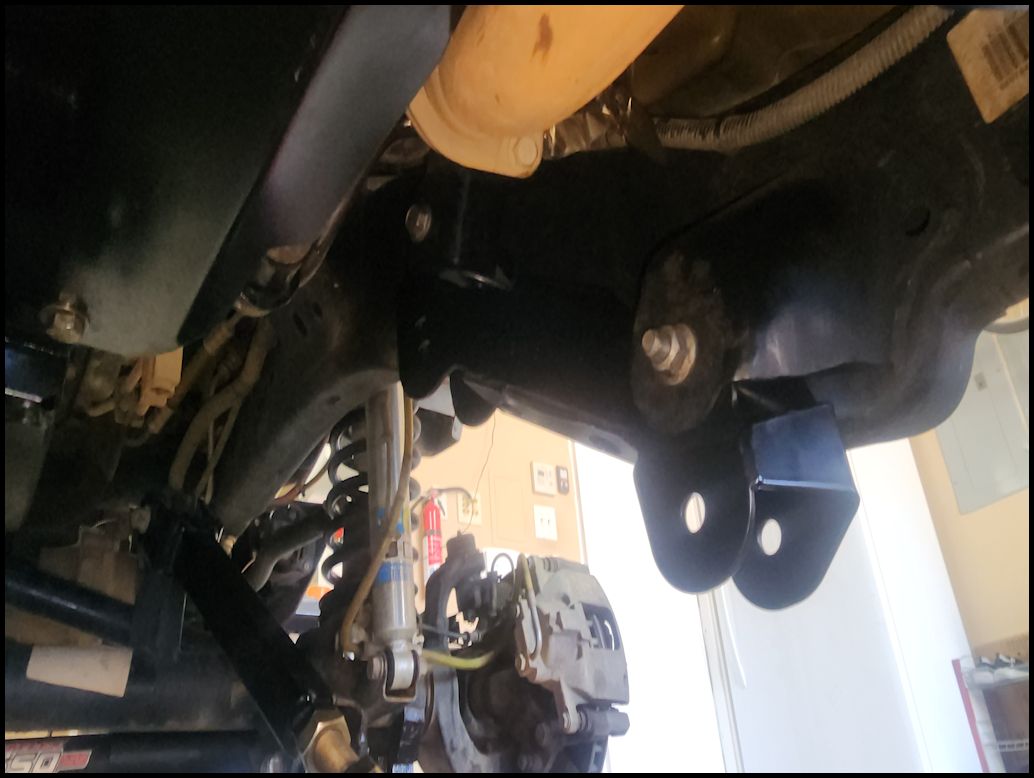
8. Install the drop bracket into the frame side upper and lower control arm brackets using the OEM bolts. I found it easier to install the upper bolt first and then swing the bracket into the lower to install the bolt. You will need an 18mm socket and 18mm combo wrench for the upper, and a 21mm socket and 21mm combo wrench for the lower.
|
 |
 |
| Note: The upper frame bolt uses a flag nut that you will need to position on the inside of the bracket. It goes between the bracket and the frame. There is a small pocket behind the upper frame mount. This requires a little bit of patients to get lined up. |
 |
| Note: If you have skid plates installed you may run into interference between the skid and the drop bracket. I have EVO skids installed and the section that protects the exhaust loop bolts to the lower control arm bracket. I had to cut the mount off at that location to clear the drop bracket. |
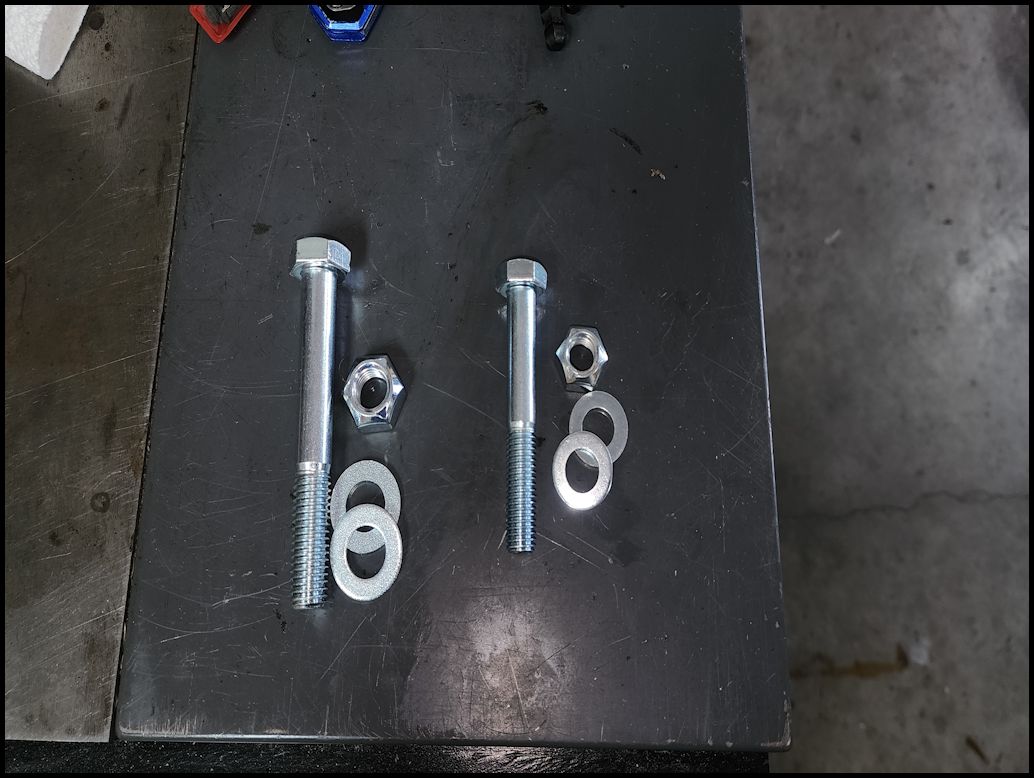
| Each bracket requires a 12mm bolt, (2) 12mm washers and a 12mm nut for the upper control arm. You will need a 14mm bolt, (2) 14mm washers and a 14mm nut for the lower control arm. |
 |
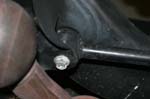
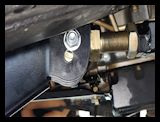
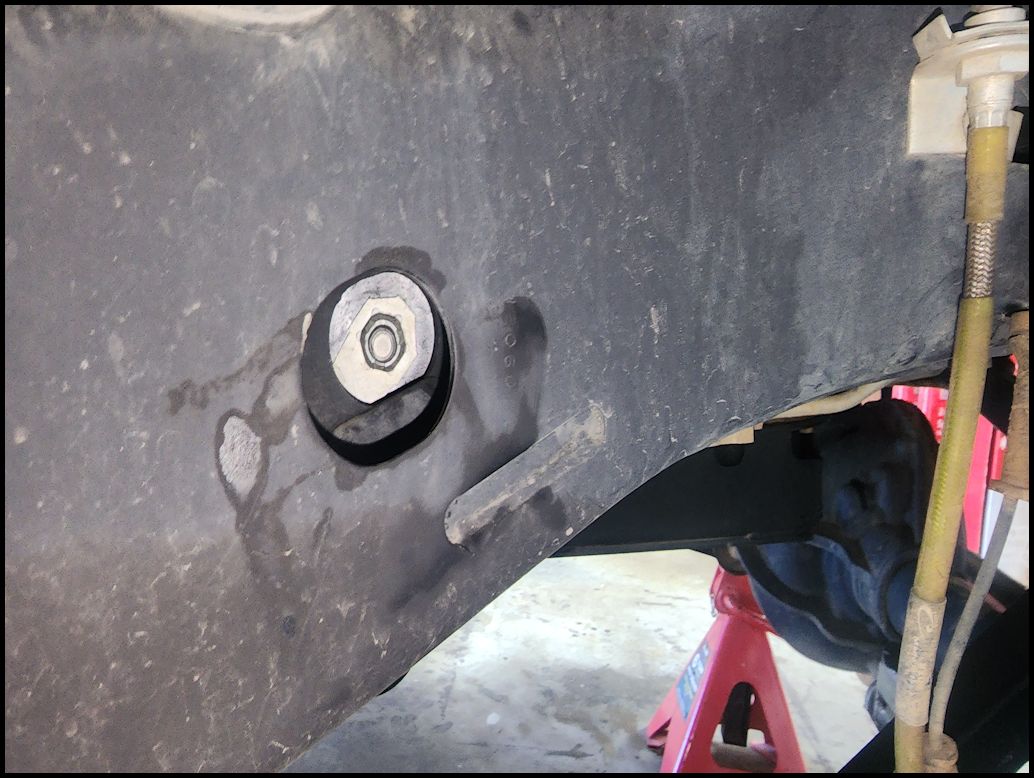
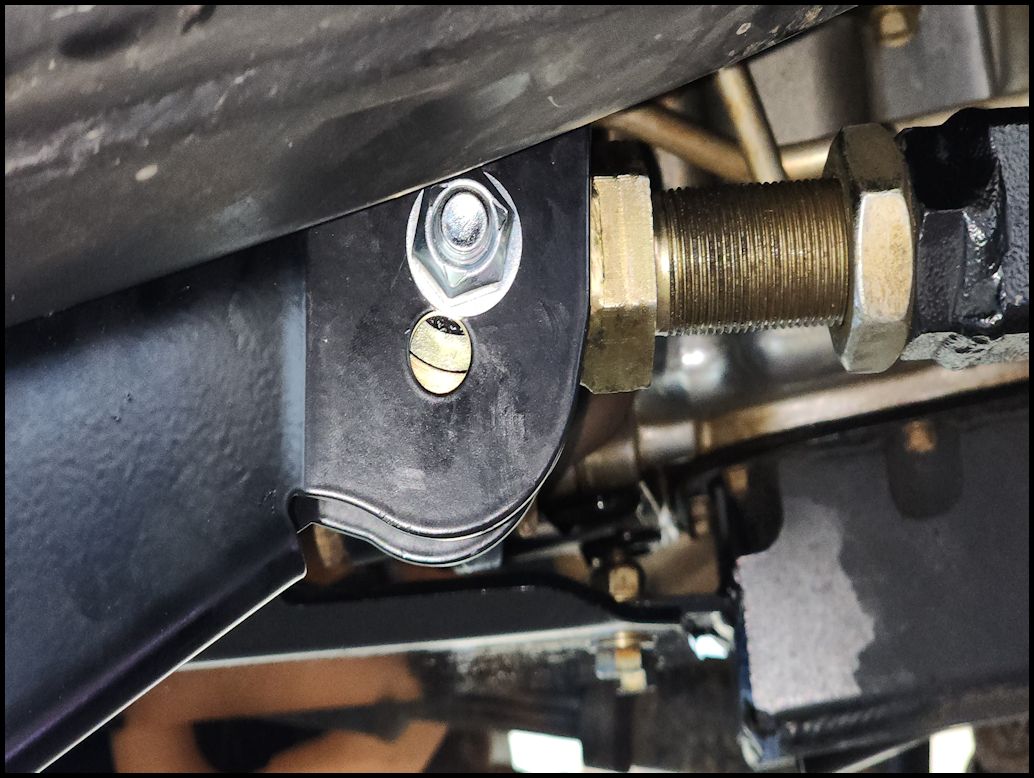
| 9. Swing the upper control arm up and into the bracket. There are two holes in the bracket at this location. The upper hole is for a 2 to 3.5" lift and the lower is for a 4"+ lift. Install the supplied bolt, washers and nut. You will need a 12mm bolt, (2) 12mm washers and a 12mm nut. You will need a 3/4" socket and combo wrench. |
 |
| 10. Swing the lower control arm up and into the bracket. Install the supplied bolt, washers and nut. You will need a 14mm bolt, (2) 14mm washers and a 14mm nut. You will need a 7/8" socket and combo wrench. |
 |
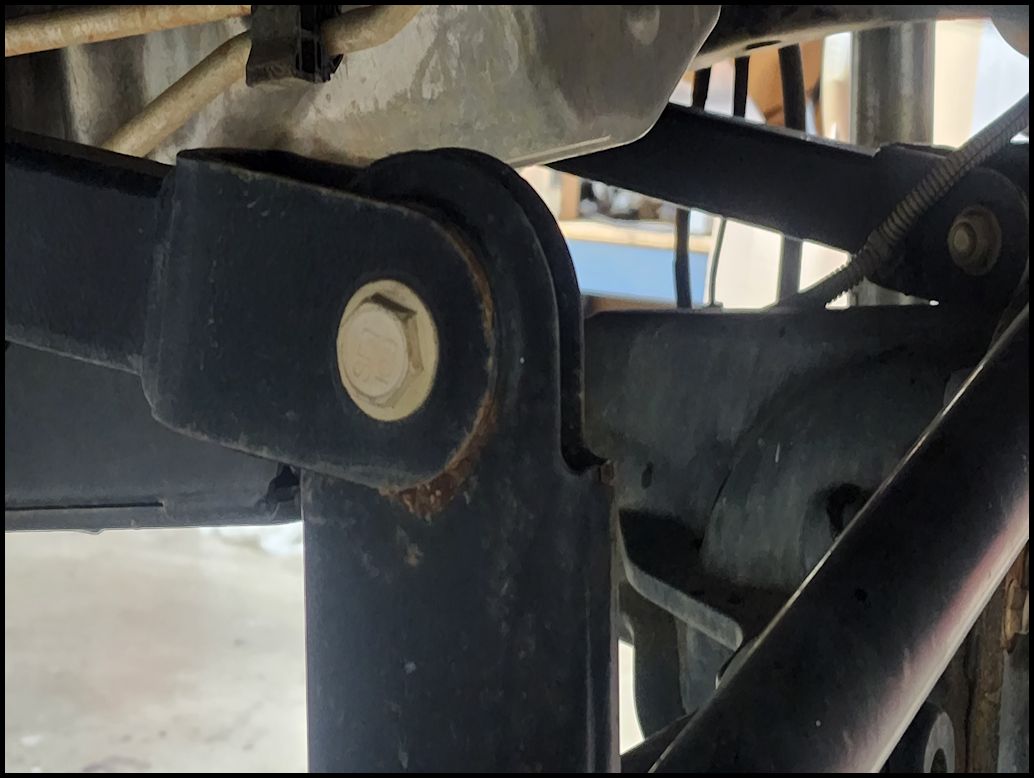
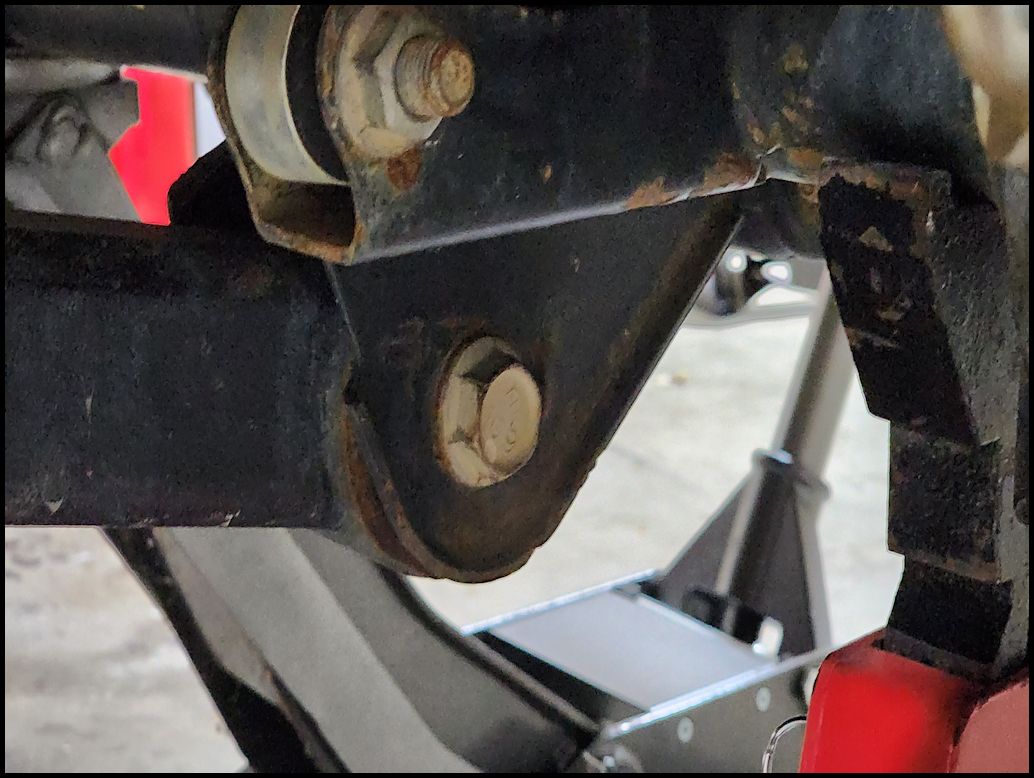
11. Reinstall the tires and set the Jeep down on it's own weight. Torque the control arm bolts and brackets. Remember to check torque again at 500 miles, or earlier if something feels off. If you have adjustable lower control arms and reset them to factory spec's, don't forget to tighten the jam nuts back down. Don't ask how I know. |
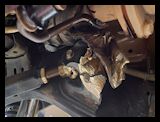
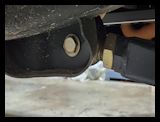
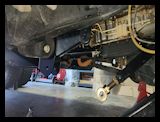
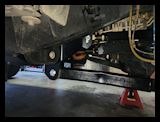
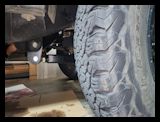
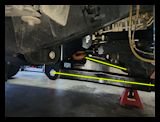
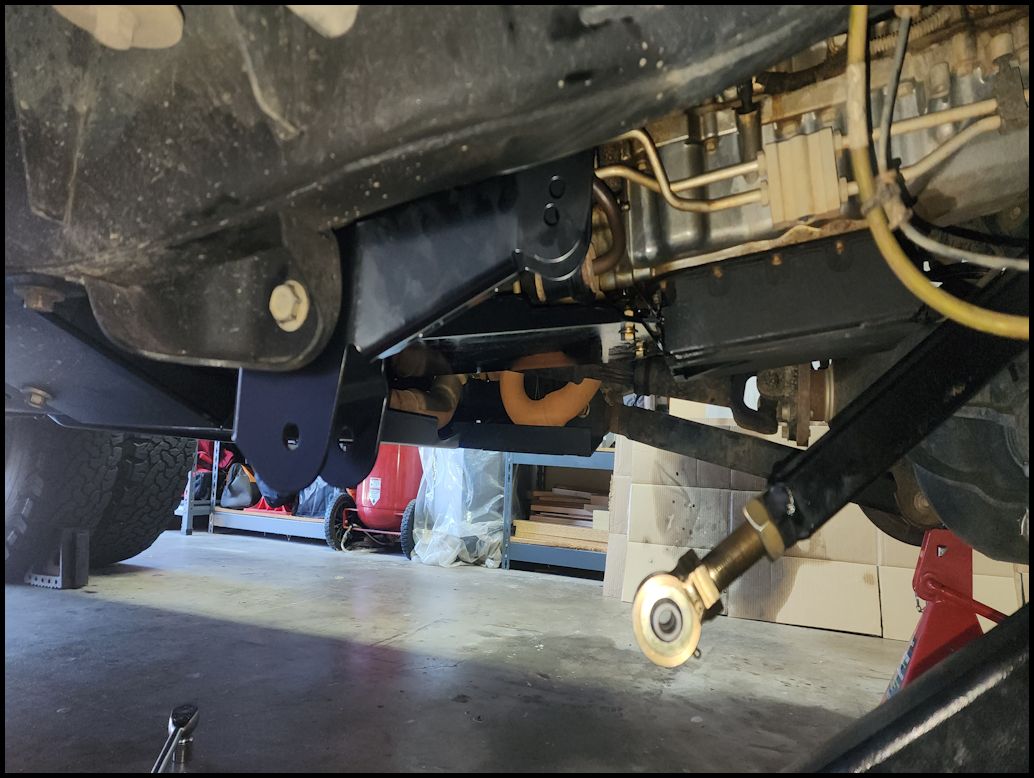
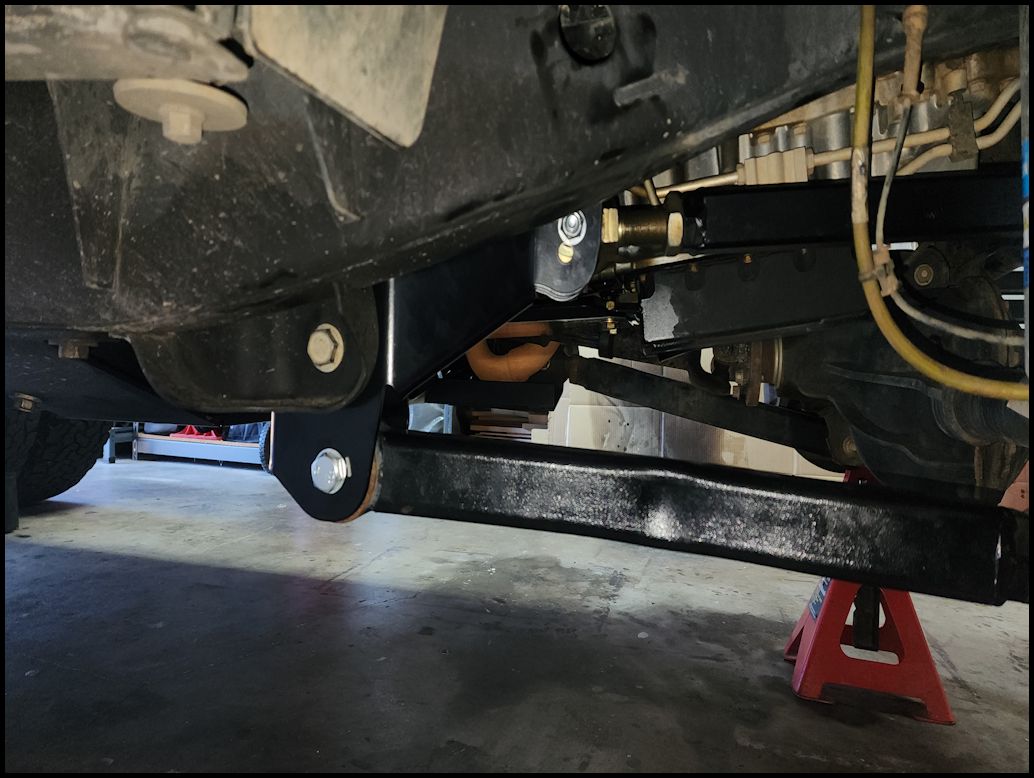
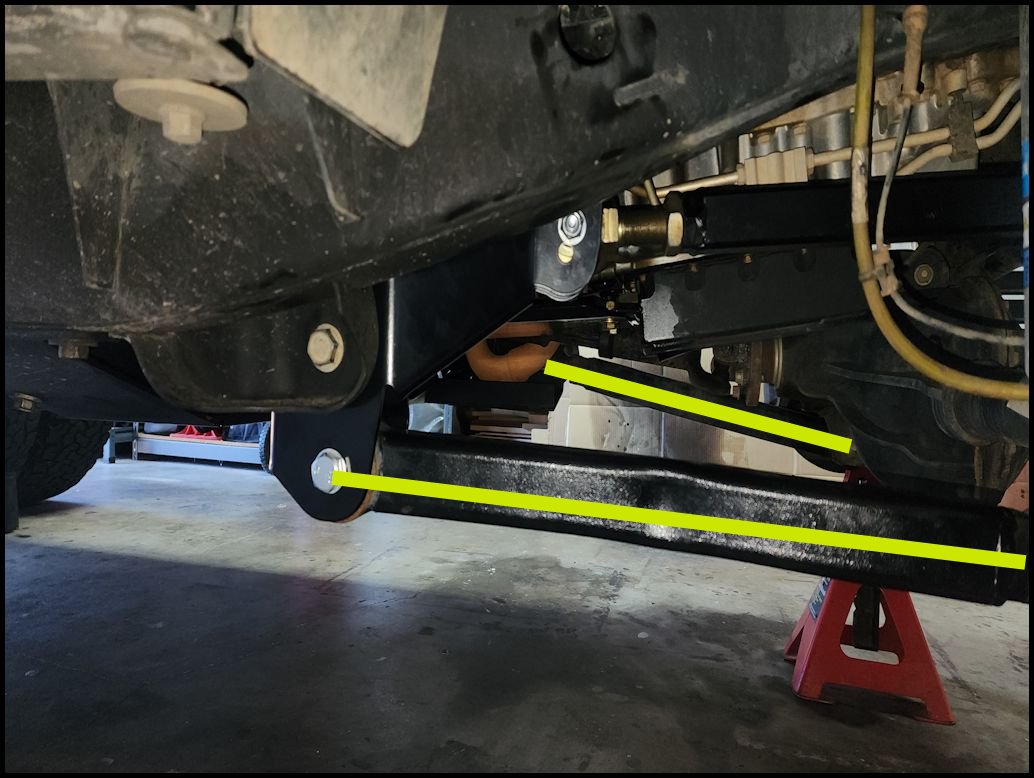
You can see how flat the lower control arm is with the installation of the drop down bracket. |
 |
 |
|
| Thoughts: |
| One of the biggest things that I felt after installing the brackets is that driving over bumps completely changed. One of the roads I drive almost every day has ridges across it at almost every crack. The Jeep always felt like it was impacting the bumps before driving over them. With the brackets the Jeep drove over the bumps without to much of a shudder from hitting them. This I can contribute directly to the flatness of the control arms with the brackets vice without. The other feeling was that the steering was tighter. I didn't really notice this until I was on the freeways. The Jeep felt more planted as it drove down the freeway. This is all seat of the pants feel, but I have driven the same Jeep for over a decade and know how it feels. I would definetly recommend going with the drop down brackets to restore most of the factory ride. |
| |

