I can't count the number of times that I have either popped out
of 4 low, or had troubles getting it into 4 low. Luckily I haven't
experienced the headache of having the rods pop out of the little grommets, but
I know that it was only an inevitability after putting in the body lift and the
motor mount lift. It had gotten harder to shift, so I knew it was
time. Now I had recently helped install one of these on a 2002 TJ, so I
had experience with the little headaches that go along with it. One thing
of note is that the Transfer case shifter lever is pointed up while on the 231's
it points down. So to solve these possible headaches and make my shifting
easier I decided to install Skyjackers Transfer Case Shifter Relocation
Bracket. I picked this over the Advanced Adaptors, because I liked how
solid this one was, and didn't like the fact that the AA bracket only replaced
the body mount, but left the flimsy transfer case bracket alone. The part
number for the Skyjacker bracket is JSRB231A. This is the bracket that was
normally used for the Auto tranny, but is now used for both. 231M was discontinued.
Additional
Parts:
None
Tools
Needed:
Pliers
Long Flat tip screwdriver
10mm socket
1/2" Socket
13mm Combo wrench
9/16" Combo wrench
1/2" Combo wrench
Dremel with cutting wheel/ or equivalent
Installation:
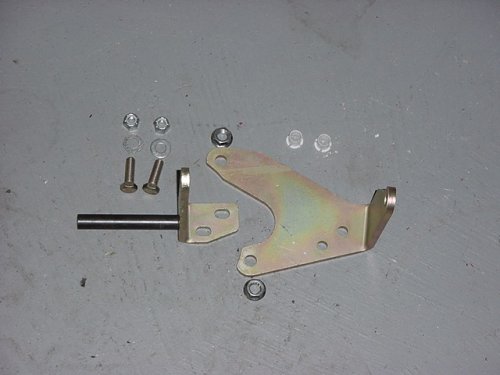
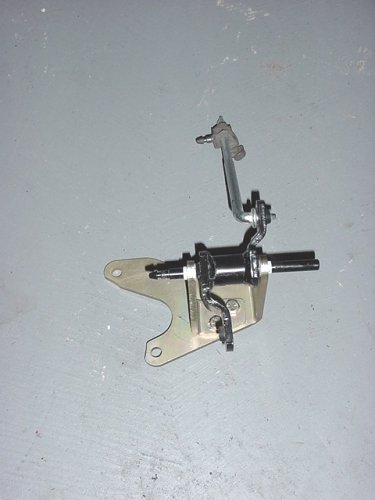
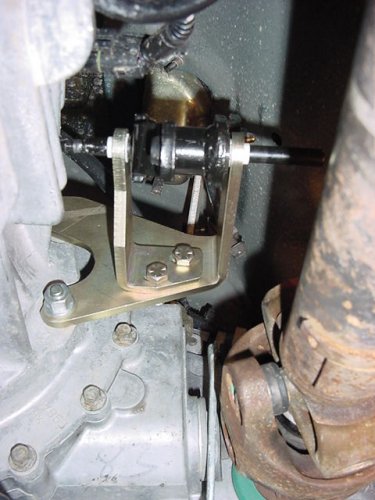
Here
is what all the parts look like. I preassembled it to check the
bore on the bracket. Some of these were made incorrectly and the
parts don't line up. We did install one that was off, it was a little
tight, but still worked.
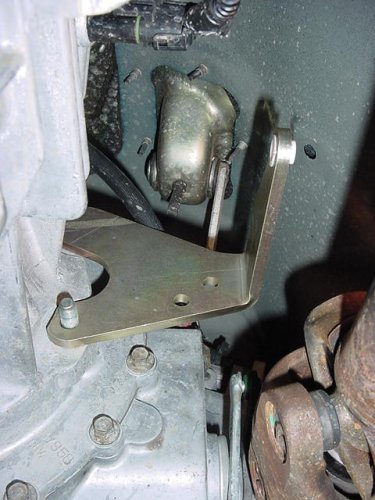
1. Installation
is simpler than the instructions make it appear. The first
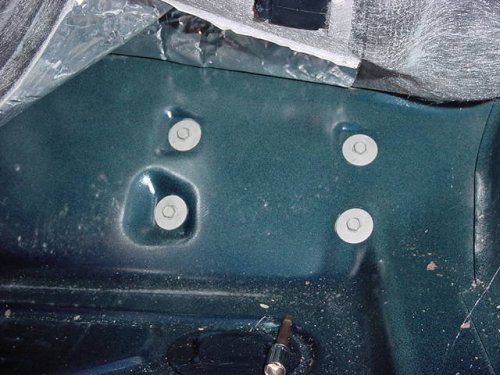
thing you need to do is remove the body bracket. Lift up the
carpet on the driver side and you will see (4) 10mm bolts.
Remove these and the bracket will be free underneath. Now
slide under the Jeep and pull out the bracket. Be careful
of the rubber boot on the shaft, mine had a spring and ended up
in my face when I popped the bracket free.
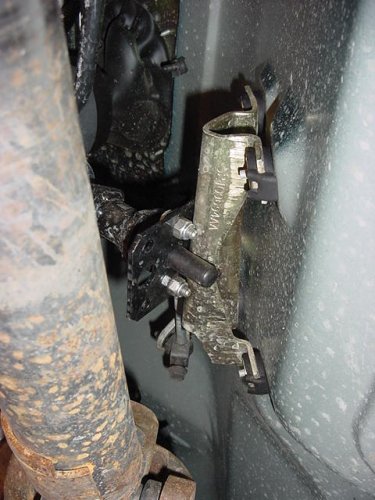
2. Now the skyjacker instructions want you to pry the rod
(torque shaft rod) from the transfer case range lever. I just
popped it free from the pivoting assembly (Torque shaft).
Once you get that free you need to remove the shift rod from the
shift lever. I just pried the trunnion block off of the lever.
Now all that is left to get this thing out is to get a 9/16"
wrench on the 2 nuts holding the transfer case bracket on.
Once you get these just pull the assembly out. Be careful
the screw on my trunnion block got caught in the front driveshaft
universal and was a real pain to get back out. Once you get the
assembly out you need to remove the transfer case bracket from the
Torque shaft. I tried to do as installed, but the bracket
kept flexing and I couldn't get it out. I just hooked it through
the front tow hook and gave it a twist and it came right apart.
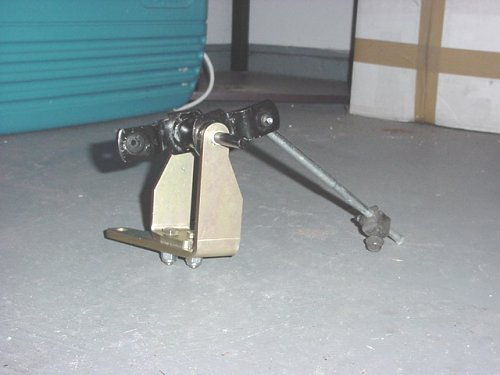
3. I decided to test fit the bracket up on the
transmission to see if it would fit, since they didn't advertise
it as fitting the
4. Assemble the new bracket as per the directions from Skyjacker.
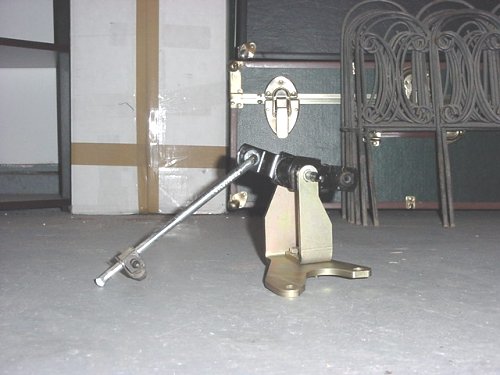
Now since this is designed to accompany skyjackers belly up, I believe
that one part of the directions do not apply. Okay I know
it doesn't apply since I installed this on 2 Jeeps now. Skyjacker
has you cut the shift rod and install an extension piece.
Skip this part, it doesn't have to be done and will make the shaft
to long if done. You won't be able to adjust it. I believe
that this has to be done with the belly up. The other part
that I skipped is cutting the ends off of the torque shaft.
It is kind of tight, but there is enough clearance to reinstall
it with out cutting. I will have to see when I raise the skid
plate if the one side interferes with the body.
Note: If you have the Automatic you will need to cut
the shaft on the side that faces the transmission. The Auto has
a web right in that location that interferres.
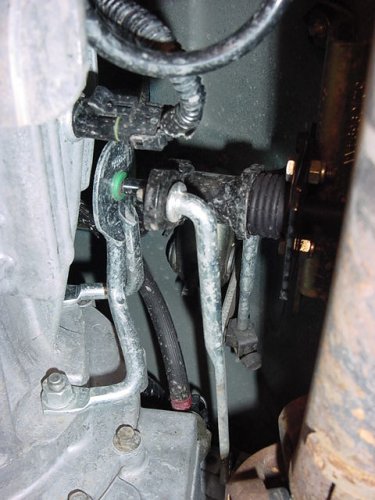
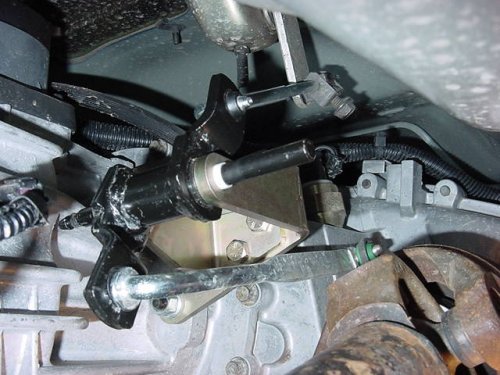
Now
all that is left it to get the whole assembly back in. The
hardest part is getting the pliers on the rods and reinstalling
the ends in the bushings. Once you get them back in all you
need to do is adjust the trunnion. You might get lucky and
have it be just right so try the shifter out before you adjust.
The trunnion bolt is a 13mm. You may have to adjust it a couple
of times to get it perfect. It helps if you have a second
person to help you out. This time it took me longer to adjust
it than to install it. The last time I got it on the first
try. Oh well.
The
shifts are now nice and crisp. It feels good going into 4
low. The only concern I have is how close the torque shaft
is to the bottom of the bracket. It doesn't hit and stays
about the same distance away, so I will just keep an eye on it in
the future just in case. I don't expect to have any problems
with it.